Leaderboard
Popular Content
Showing content with the highest reputation on 09/22/2021 in all areas
-
The standards are fine but I just use this link and tirerack.com. Anymore I just buy BFGs (usually Comp 2 A/S) or Michelin or Continental (DWS06). Know 225x60R16 or 235x50R17 will fit my GM FWD cars. BTW always felt the 15x6 stock rims had to be beancounters at work. Even my Fieros had 15x7s and the family 90 Bonneville had 16x7s. Reattas deserve "more".1 point
-
1 point
-
So I only have a car-port so I have to keep my Reatta outside and living in the hot humid south I have noticed that it gets pretty humid and clammy in the car during the summer, especially after rain. To combat this I decided to try one of these miniature dehumidifiers. https://www.eva-dry.com/product/e-250/ So far it seems to be working really well. I figured I would share and see if anyone has different solutions to share. Or maybe I'm the only one who doesn't have a garage lol.1 point
-
Autsop Car Cover from Amazon. Galapara 15W Solar Panel Charger is from there also. Dunno why but editor keeps screwing up the formatting and links.1 point
-
The pipe wrench doesn't have to be large, which is the image that springs to mind. Something 8"-10" for the size we are looking at. put a short length of pipe over the handle for more leverage. I know I have crushed pipes when trying to remove one that's rusted/stuck due to the clamping force available when twisting. It would need to be pulled free of the bracket as Ronnie said to be able to get something around it.1 point
-
Start by getting some flare wrenches, AKA tubing wrenches, to help prevent rounding off the nuts. Spray repeatedly for a few days with penetrating oil. I like Kroil penetrating oil if you can find it. PB Blaster is good to.1 point
-
It probably is keyed. My thinking is if you take the clip off the bottom that holds the hose down in the bracket you could slide the bracket out of the way. Once that is done I think you could put a small pipe wrench around the remaining metal part of the hose and a small pipe wrench on the fitting for the tubing that screws into it and break the fittings loose. Yes I know that is a crude way to do it but sometimes brute force is what is needed to get the job done. A pipe wrench can put more clamping force and more bite on the fittings than any channel lock or vice grip pliers. The harder you pull on the handle of a pipe wrench the tighter it squeezes.1 point
-
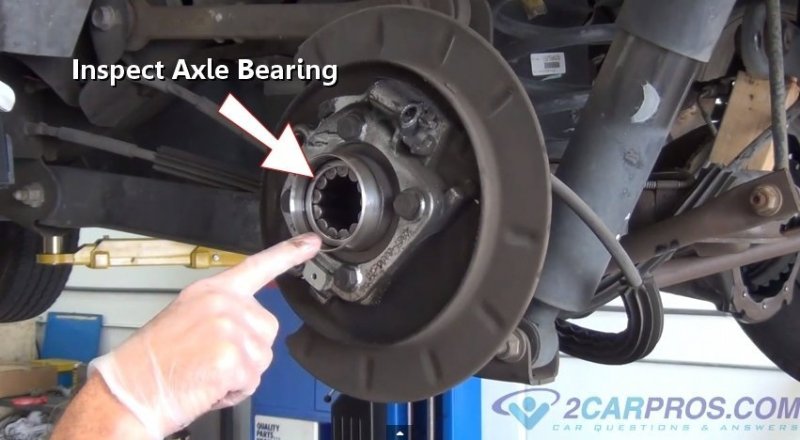
@2seater Here are the pictures I promised you. So the repair bearing sits just outside of flush with the axel housing (sticks out about 1/8"). I measured to the interior edge of the rollers of the repair bearing and compared to where that is in relation to the point on the axel that is flush with the exterior of the bearing. As you can see the rollers of the repair bearing ride just exterior to the worn portion of the axel. I did not get a picture of the stock bearings before I removed them but I found this picture online that is representative of how far inside the axel housing the OE bearings ride. I don't know. Figured I will give it a try. If nothing seems amiss when I drive it for the first time. I will probably give them 1000 miles or so and then pull the axels back out and just see what it looks like.1 point
-
Wow step away for a minute. 2.5 cfm @ 90 psi is about the same as my carry around (about most can lift with one hand at an angle) Craftsman tankette I have in the front garage along with my original 3/4 hp (think they rated differently in the '40s) belt-drive with about a 20 gallon tank. In the back garage have a little buzz bomb connected to the lock on my lift. Also a big standup 6HP Crasftsman (#6 whatever that means) tank with a long reel. And then there is a 12v that I carry on trips. Being near deef cannot comment on noise. When using air wrenches and such big is good. Don't think anything I have is from this century though.1 point
-
1 point
-
1 point
-
You might be right. I was thinking when it was running today that a small gasoline engine would have been quieter.1 point
-
A lot of the oil-less air compressors sound like that, very loud. Mine sounds like a dirt bike with no muffler. You may have to find a oil filled pump style for quieter operation.1 point
-
Since I've been going to all battery powered tools I decided to go with a small 6 gallon Craftsman pancake compressor that can be easily moved around. I'm trying to buy light weight items when I replace something. It fits really well in my garage without taking up much space so I guess I will get another one just like it and see if it's any quiter than the one I'm returning tomorrow. It's on sale for $199, ($80 off) and comes with three tools that I might use sometime. https://www.lowes.com/pd/CRAFTSMAN-6-Gallon-Single-Stage-Portable-Electric-Pancake-Air-Compressor-3-Tools-Included/1000595155 It fits in good with my red Craftsman toolboxes. Not to mention my red Reatta and the red Reatta hanging on the wall next to it. 🙂1 point
-
Yeah my park ave ultra has a supercharged series 2 in it. My brother and I a while ago put a smaller pulley on the SC and a flashed ECU with a more aggressive tuning in it along with a few other minor things like less restrictive airbox, different thermostat etc. Haven't had it dyno'd but it really moves. That engine is stock at 240 hp and guessing it picked up another 20-30. To me that would be the perfect amount of power for a spruced up Reatta. The trick would be integration because I would want to try and preserve other things like the instrument panel etc if possible.1 point
-
Doubt it, I still have a spare LN3/4T60 drivetrain in the back garage and things you have a spare for don't break. For more power I bought an Allante with 4.5 V8.1 point
-
Even though the LN3 and its siblings were in millions of cars, the last LN3 is now 30 years old, so finding a low mile one may be an issue. Rebuilding is always an option of course. There is nothing exotic about it as long as it is treated as a Buick design and not a Chevy, plus parts are generally a little to a lot more expensive. A good time to maybe do a little upgrading and the other option is a Series I L27 up through 1995 will swap in almost directly, but will need to use the intake manifold of the LN3 to keep the EGR and some other things the same. It always depends on your interest and ability to make the repairs. I know I would have no qualms about rebuilding it if the price was very right, but I have the interest, the facility and the knowledge to do everything but the machine work myself.1 point
-
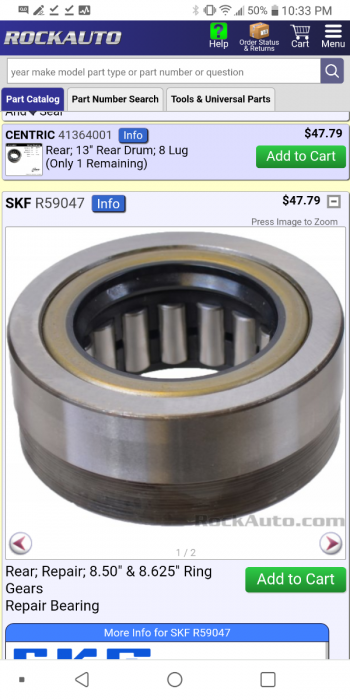
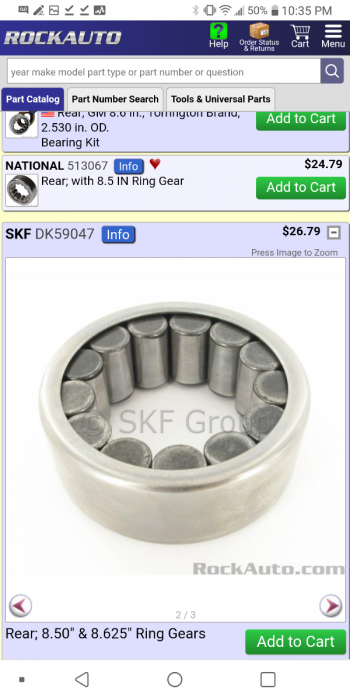
So I am going to divert the conversation away from these fuel efficient cars to talk for a sec about my gass guzzling 1995 GMC Suburban. So I am in the process of replacing all 4 wheel bearings on it, which it has needed for quite some time. The rear bearings are interesting as they do not have an inner race but rather the axel shaft rides right on the rollers of the bearing. Because of this they will wear a groove into the axel shaft and the shafts must be replaced along with new bearings. However I have come across these things called "repair bearings" which shift the position of the rollers over slightly to run on an un-worn portion of the shaft. They do this, partially, by incorporating the shaft seal into the bearing as a unit so as to make more efficient use of space. Has anyone ever heard of these? I am going to give them a try but cannot help wondering if it is just a band aid. I bought SKF brand ones. I figured they are pretty reputable and seem to be well made. The odd thing is that the rollers are quite a bit smaller, but there are quite a few more of them. Attatched a picture of wear on the axel shaft and comparison of SKF repair bearing and traditional style.1 point
-
1 point
-
The toughest part for me was the little bolts holding the nylon rollers, they often break. I had to drill them out and substitute longer bolts that go straight through and a nut/lock washer to secure. I got my rebuild kit from Barney Eaton but then discovered all I needed were the nylon rollers. Actually, it was fun figuring everything out, cleaning and repainting the plastic frames flat black before assembly.1 point
-
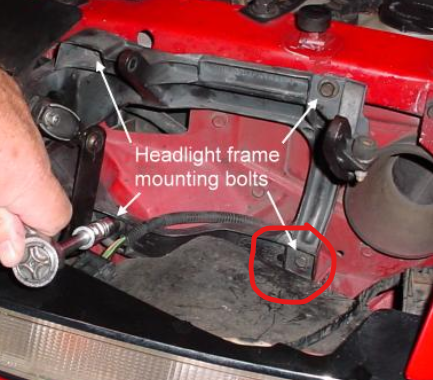
Thanks Ronnie. I always look in the how to guides often, and did use the headlight assembly removal guide. Just a fun and involved process is all. I did not find the motor rebuild in this list below. The wire routing I completely glossed over., but the good news is that I did run them correctly based on clearances. On my 90 convertible, the lower right bolt in the picture below is nearly impossible to get at, there is another bracket in front of it on both sides, limiting clearance in front of it to about 1". Only way to get at it was with a box end wrench and remove by hand. As always, this site is a tremendous resource!1 point
-
Thanks guys! Yes, they are metric and I'm assuming the ones suggested by Padgett of vanadium steel are the better quality ones though the one 2 seater had success with seems more expensive as the three piece set Pagett suggested is only 12.99. I can clearly see how they're designed for just this application. This connection most likely hasn't been touched since the car was built so it's expected to be difficult to get to move. Like Padgett, instead of ordering online I'll shop somewhere local now that I know what's best. Many thanks!1 point

