Leaderboard

Popular Content
Showing content with the highest reputation since 04/26/2024 in Posts
-
7 points
-
The forum has been overwhelmed with an attack by spammers trying to register for an account, mostly from Russia. For that reason I have temporarily disabled new forum registrations. I'm hoping that the spammers will go away soon and new forum registrations can be restored. Sorry for any inconvenience this may cause.5 points
-
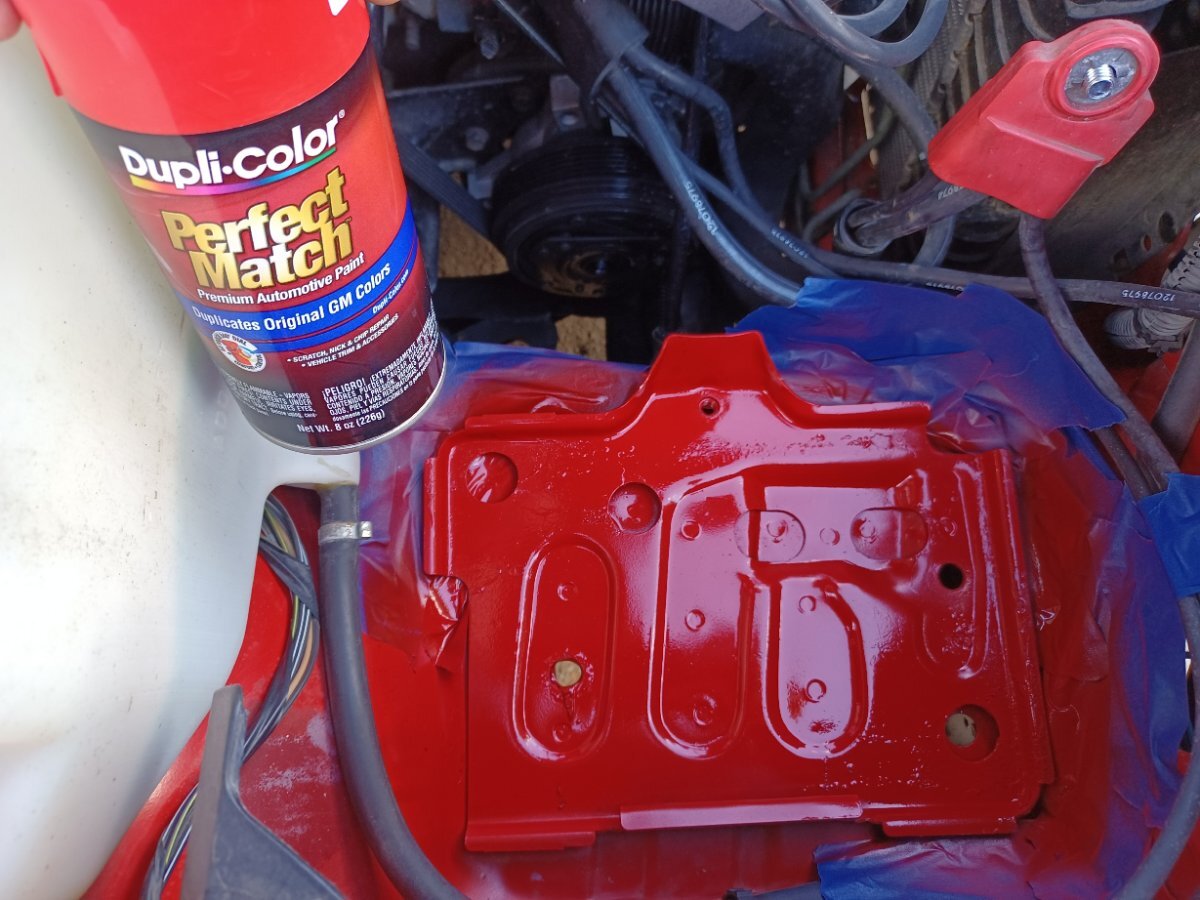
After two failures of brand-new AC Delco HR6 Compressors, I did some research and found that there is a known manufacturing defect, or "decision" as it might be put. For whatever reason, GM removed the dowel pin from the body of the compressor. Some speculate that it was done to make it easier to assemble at the factory. There is just one problem with this. When the unit is installed on the car, tightening the bolts without using shims to make the mounting surface fit perfectly flush with the compressor results in the compressor housing twisting and coming apart at the seams in the middle of the housing, and complete loss of refrigerant in short order. There are improved aftermarket versions of the compressor available that have dowel pins wisely reinstalled where they belong to keep the compressor body intact. Note that these compressors use PAG 46 rather than the PAG 150 of the original design. I hope this helps someone else who may be experiencing this problem, or prevents it from happening entirely.5 points
-
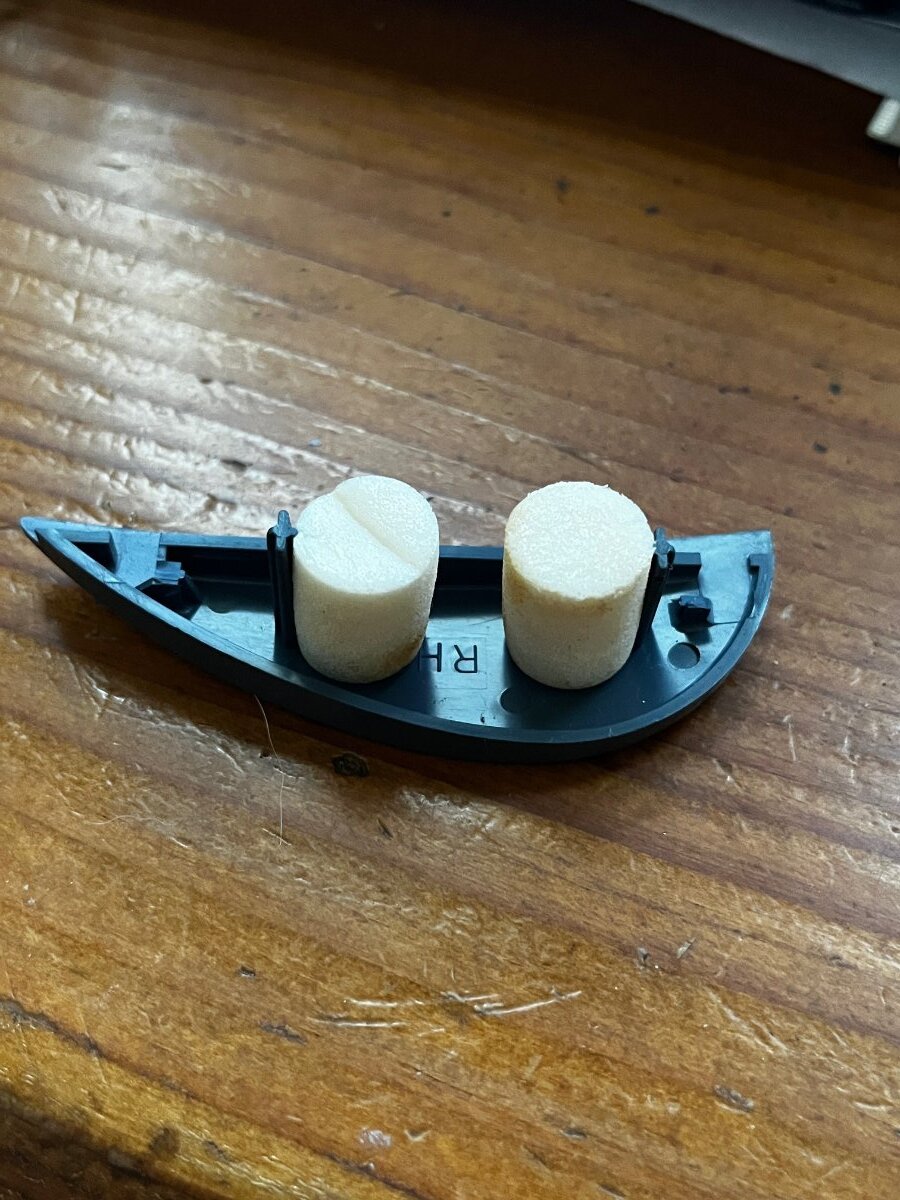
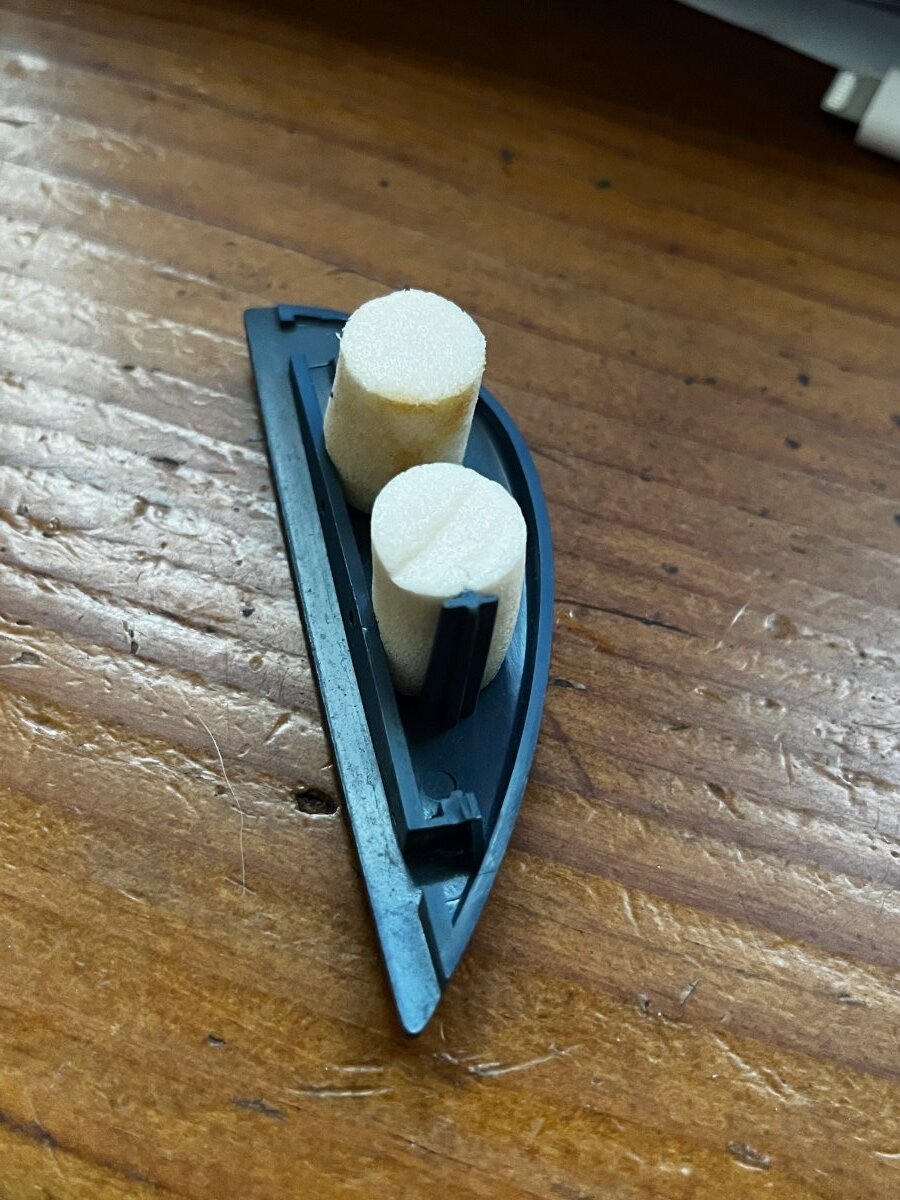
Yes one of my horn buttons finally popped off/broke and I was facing removing my steering wheel and figuring out a better mouse trap. Don't know if I did, but check it out--I glued a pair standard foam earplugs, cutting a slot to fit along the plastic tabs, and glued the button back into place. Seems to be the exact depth, rebounds after making contact, and so far has stayed in place, even in the Los Angeles sun. I used Permatex clear RTV silicone adhesive. Too simple to be true?
 4 points
 -
Update: problem solved. It turns out that the blend door was sticking and with a bit of wiggling the arm back and forth, I was able to get it to the Max Cool position where it will stay for the summer. That How To Guide here was so helpful. Thanks again ROJ4 points
-
Ship, I am a Blessed man, I still get up under the dash,, a bit of an issue getting back out and my eyes don't always see what I am looking for, and I turned 85 in Feb.4 points
-
It really wasn't until I put my known good ignition module on that I thought it was something to do with the wiring. Before I was swapping first coils and then the ignition module and old coils and finally a known good module/coil set up that I knew something else was wrong. First test was just disconnect the harness and reattach it and it would fire. Next time wiggle the wires at the ignition module without removing the connector and it would fire. I then took a close look at the harness and saw it was only a 3' harness with 5 connectors. Went to the Buick dealer and one left in the country at $200.00. Went to Rock Auto and a Dorman was $85.00. Amazon was $110.00 for the same Dorman. The Dorman was a nice replacement, looked to be of good quality. Only connector that gave me trouble was the crank sensor. It started going on so hard that I had Kendall make the connection as I didn't want to damage the pins on the crank sensor causing more work. Only things I had to remove to get at everything was the engine shroud, serpentine belt, and water pump pully. Front to back time about 45 minutes. Gotta love the 3.8!4 points
-
Just today hit 333,200 miles on the Red of which almost exactly 220,000 were put on by me. Bought the Red in December of 2006 for my 50th birthday. Flew to Fort Lauderdale to get it. Bought it from a private party and drove it home. Took the rest of the fly in day and the next to get home. Had my first experience of sleeping in a Reatta with 16 way seats!3 points
-
The servo was used on multiple GM cars in multiple years. take a walk through a you pick yard and look for a lower mileage Buick. Once you get it off suck on the big hose nipple. If it holds while you have vacuum on it, it probably is good.3 points
-
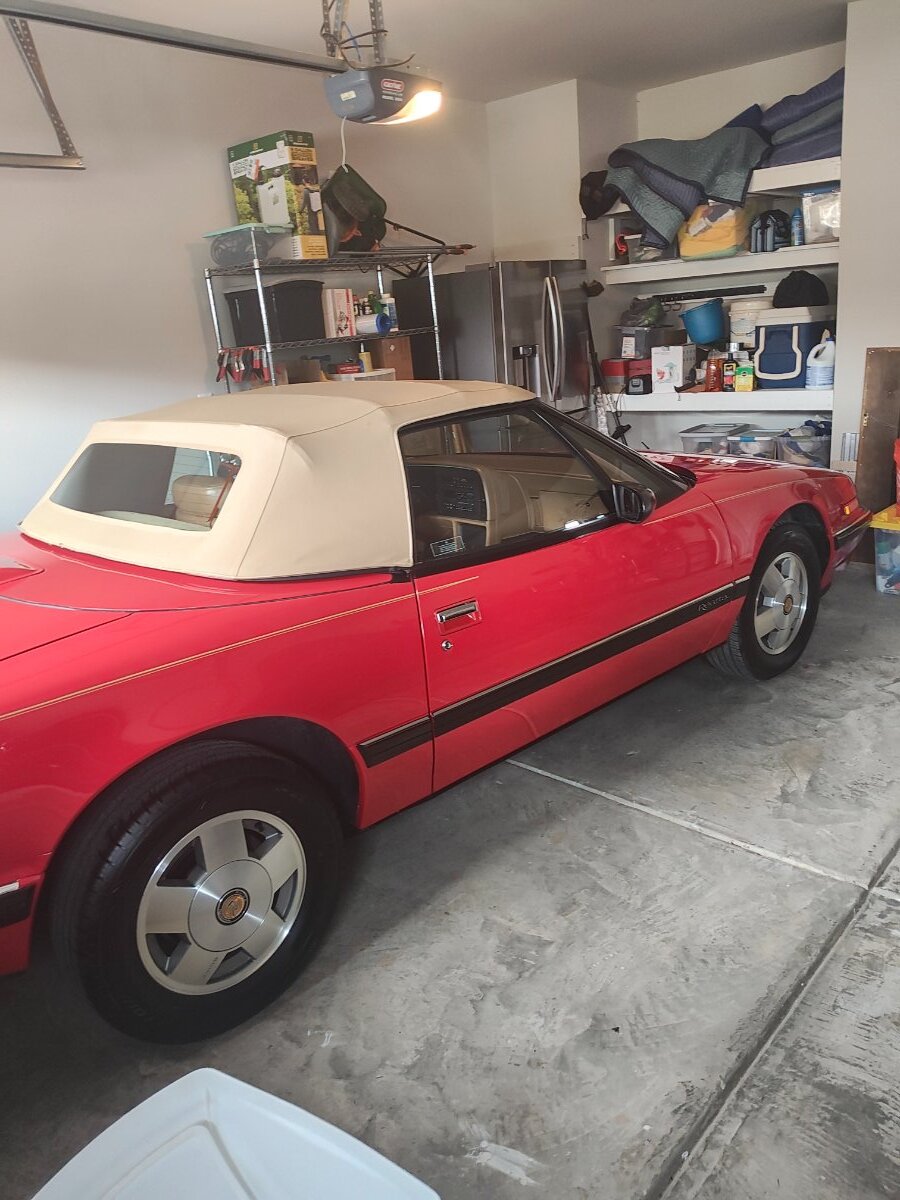
Greetings to the Reatta community. I recently purchased a 1991 Reatta that was featured on Barn Finds, and listed on Ebay. It was a one family car since new, in pretty nice shape, 63K. Red with saddle interior. Not my favorite interior color, but the red/tan combo looks good enough for me. It was shipped from Cincinnati down to it's new home here in Florida. Arrived on Tuesday, and has gotten a wash, clay bar, wax, and started fiddling with buffing out the oxidized tail light and front running lights. Interior is in good shape, but will be totally gone through as well. The only issue that does need attention sooner than later is the not cold AC. I was amazed to see the car has a "service AC" light on the dash. I will change out all the light bulbs to LED, upgrade all the speakers, and maybe the head unit to something modern with either XM or Bluetooth. Looking forward to learning about this great car thanks to this site. Peace, John
3 points
-
I was able to purchase them at my local Lowes store. There is an assortment of them in drawers in the hardware section.3 points
-
No, they are solid aluminum and can be buffed. The top layer is anodized and really should be stripped and then buffed. When you are finished you have bare aluminum. I took mine off and stripped them, then I took them to a fellow I know and he polished them, only the part that shows. To keep them shiny I polish them with a product the polisher recommends. It's called " White Diamond."3 points
-
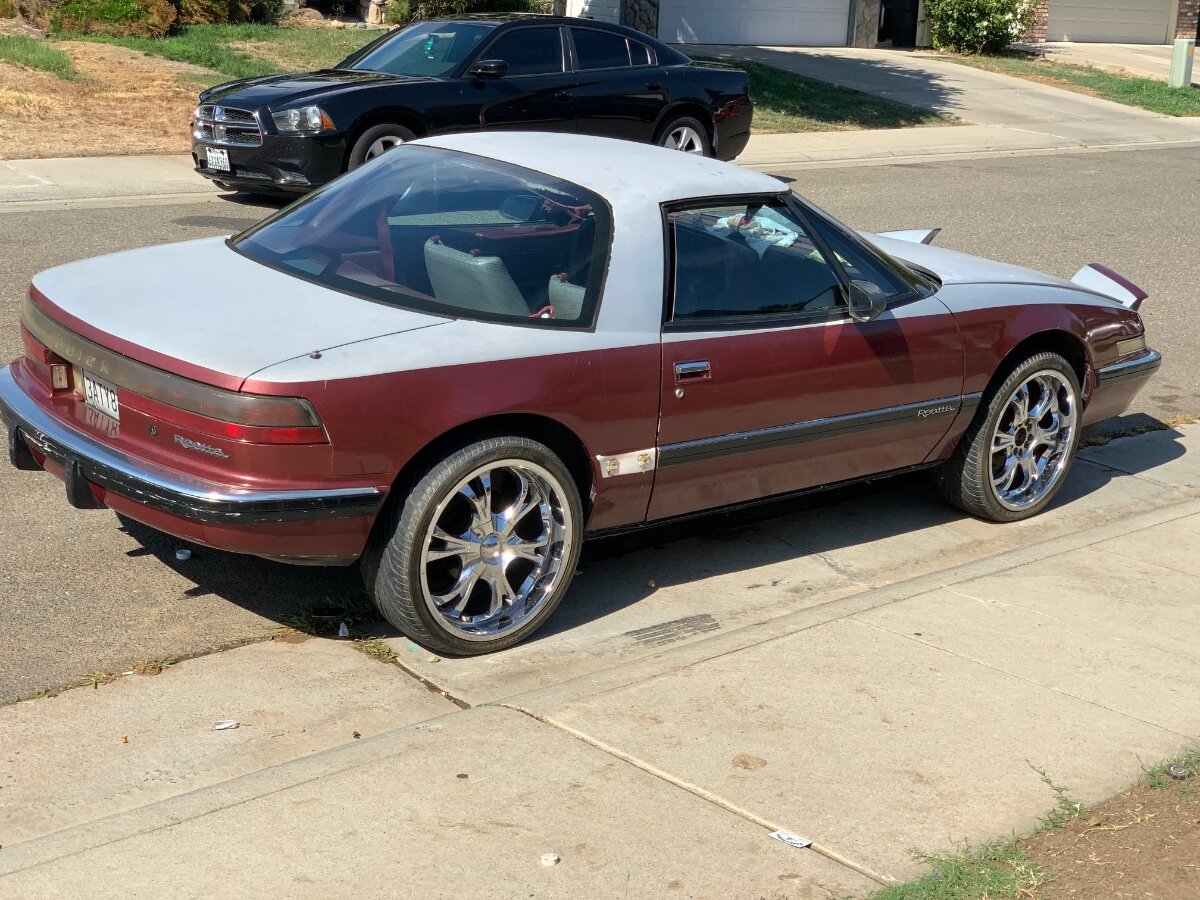
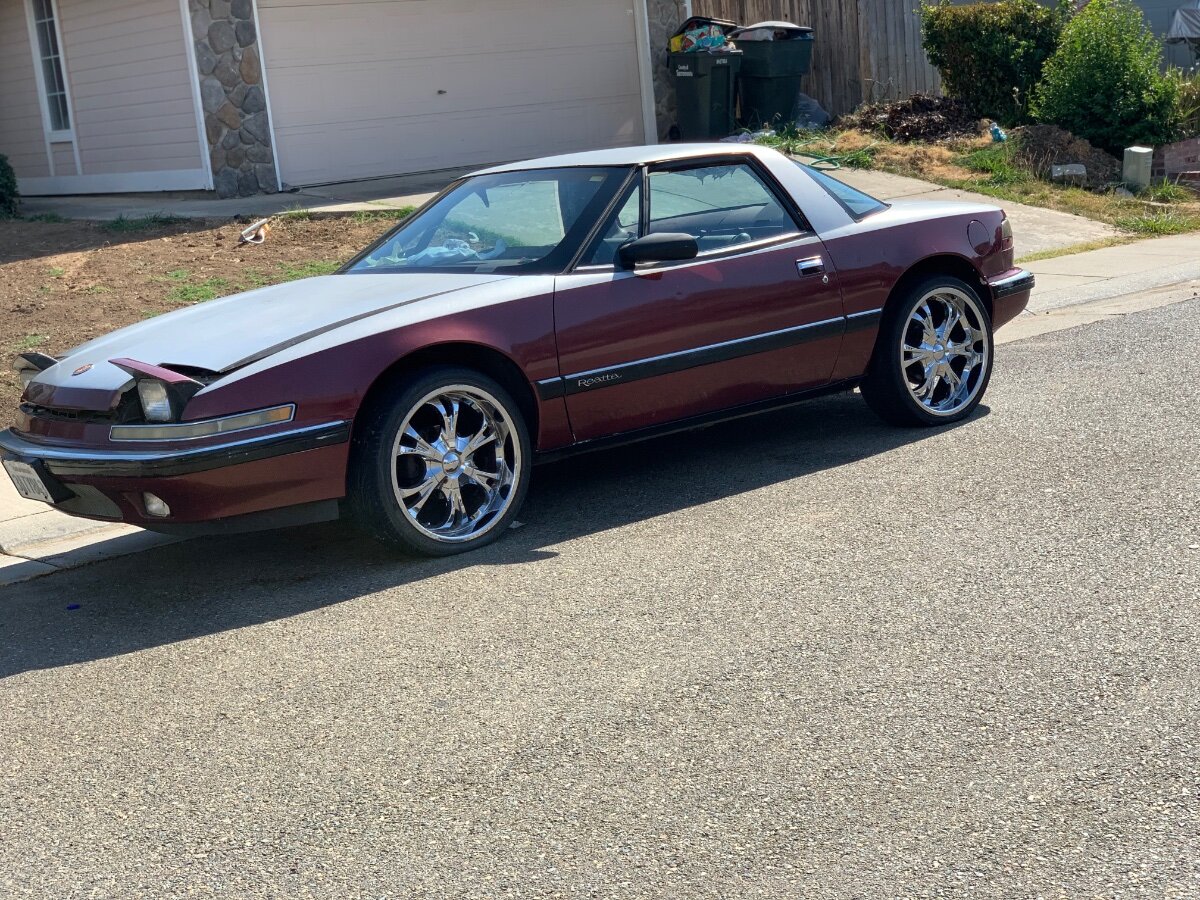
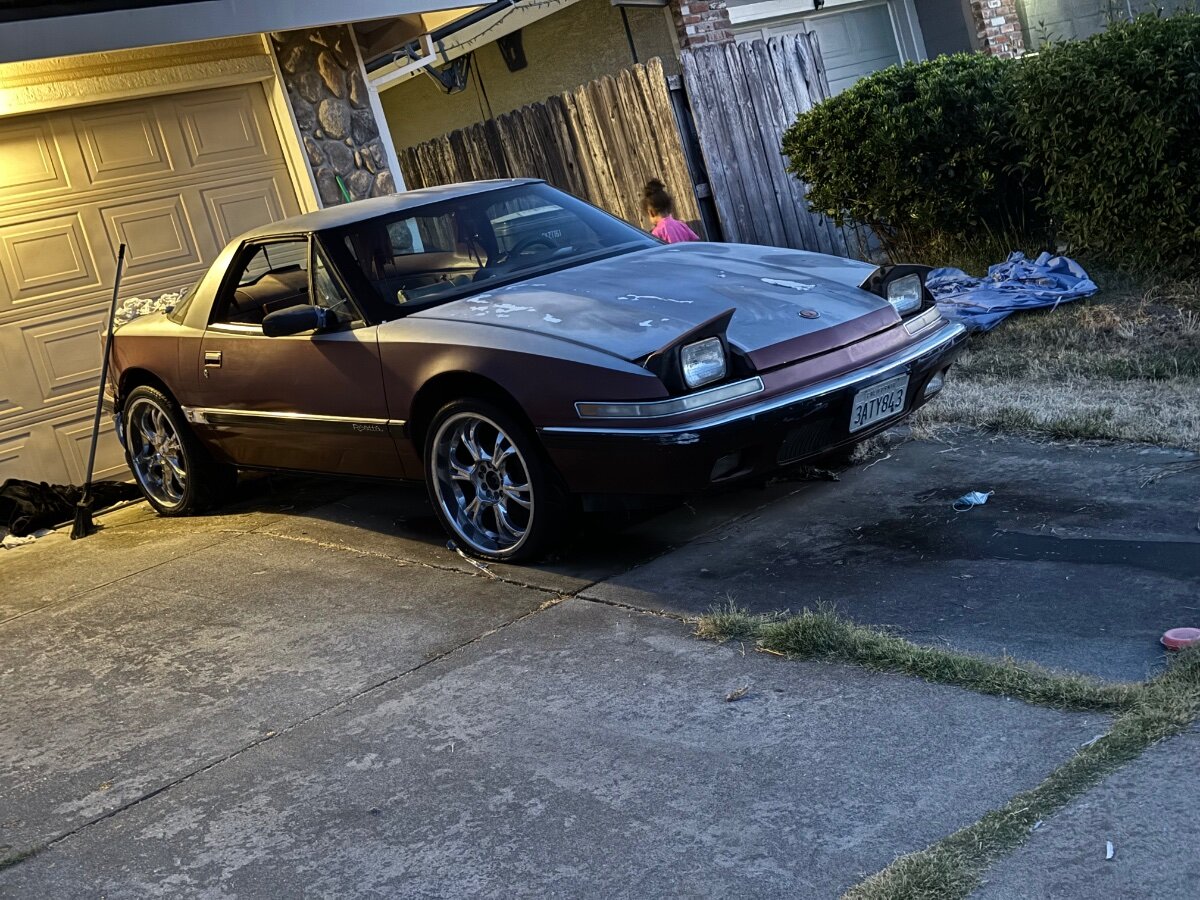
My reatta isn’t nice like most of the ones in here but very soon it will be my dad painted it put rims on it and changed the seats for me to like it 10yrs ago everything else on this car is original from 1989 when it was manufactured as a teenager I didn’t think much of it I’m a little older now I’ve fell in love with it the 1st time I spent money on in April of this year its just the rarity and Chase of finding parts. Boy when I tell people the parts are for a 1990 Buick reatta with 73k original miles the responses and reactions make me fell as if brand new Porsche… Can’t wait to hear the responses my kids get with it
3 points
-
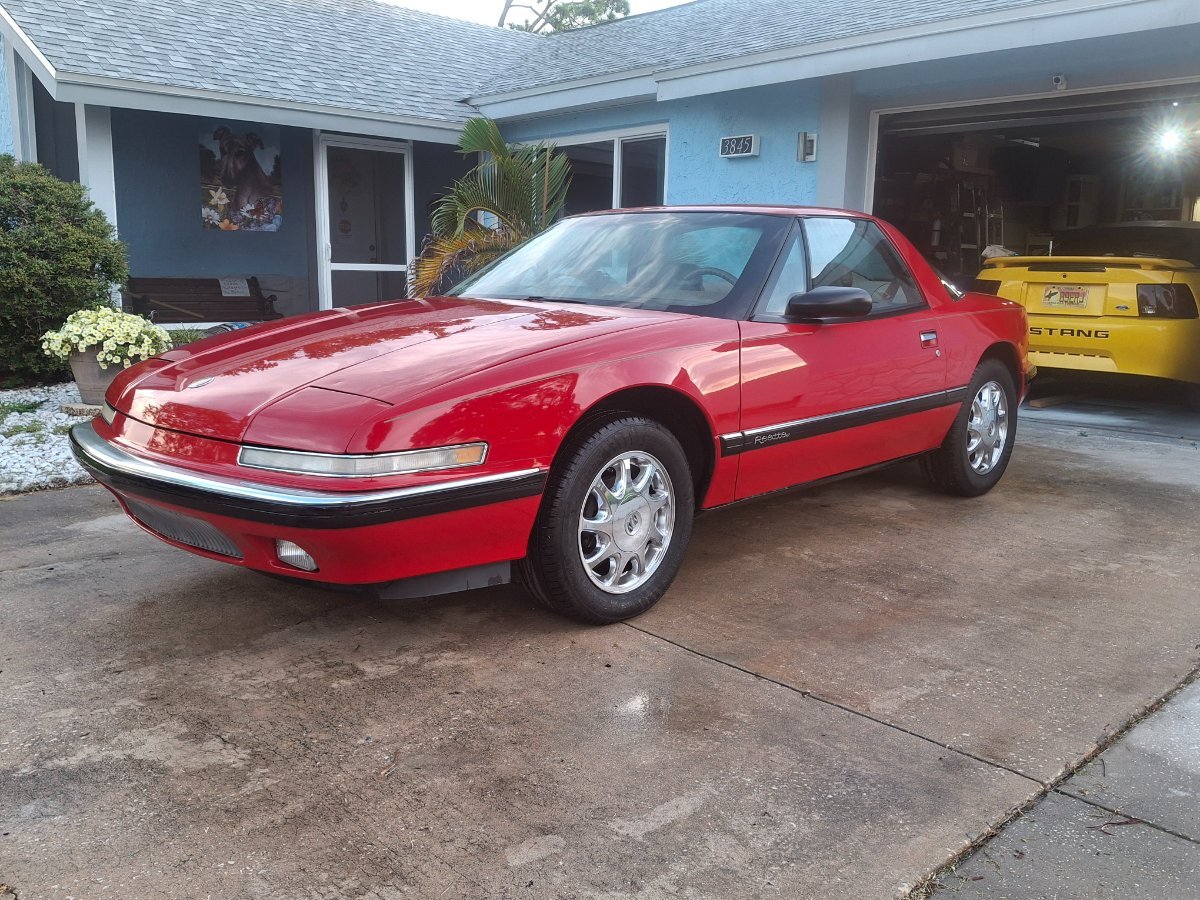
Look at that! Both a Mustang and a Reatta can coexist in the same garage!3 points
-
3 points
-
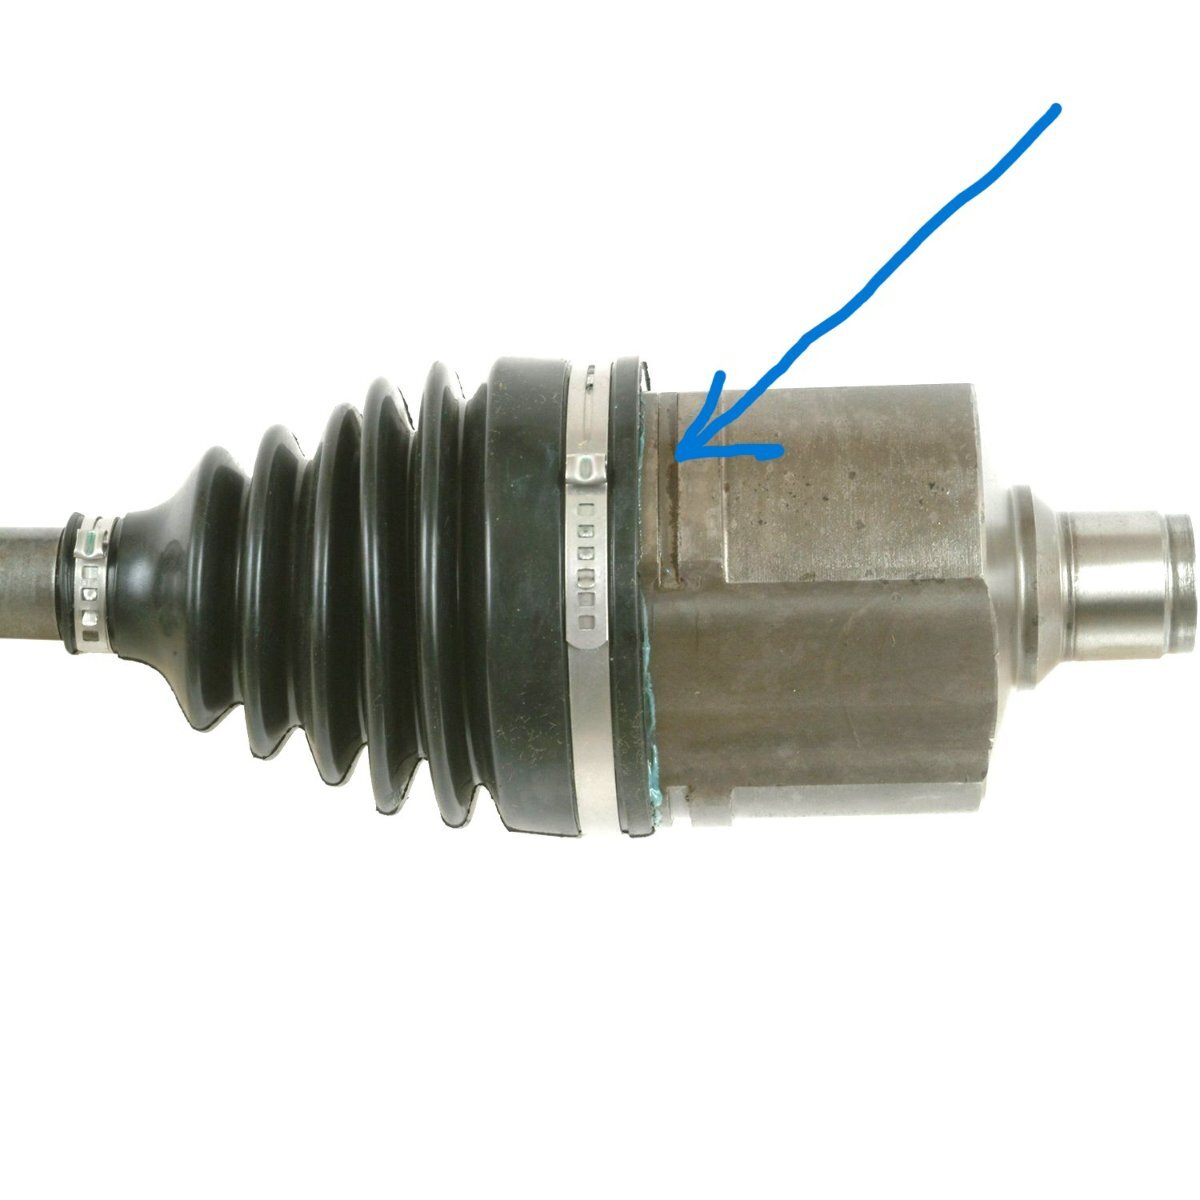
I had to install an axle in my Reatta a few years ago and this is what I remember. The axle and transmission splines have to line up properly to get the axle started inside the transmission. I don't remember anything else that needs to be lined up. After the axle slides in so far it will seem to stop. Then you will need to put a large screwdriver, or something similar, in the grove shown in the photo below and carefully hit the screwdriver with just enough force to get the axle to pop over the snap ring to lock the axle in place. As the FSM instructions said, don't push or pull on anything except the part of the axle that has the grove in it or the CV joints could come apart.
3 points
-
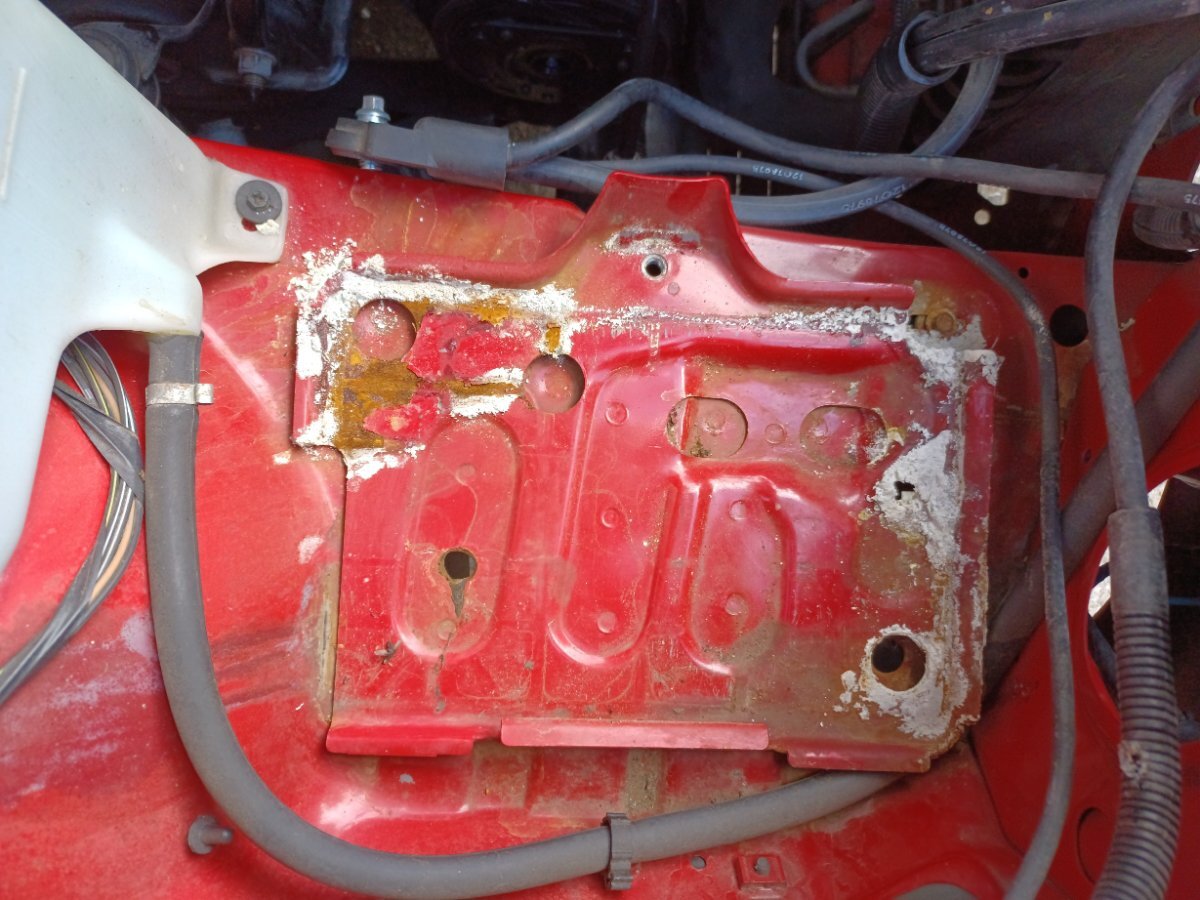
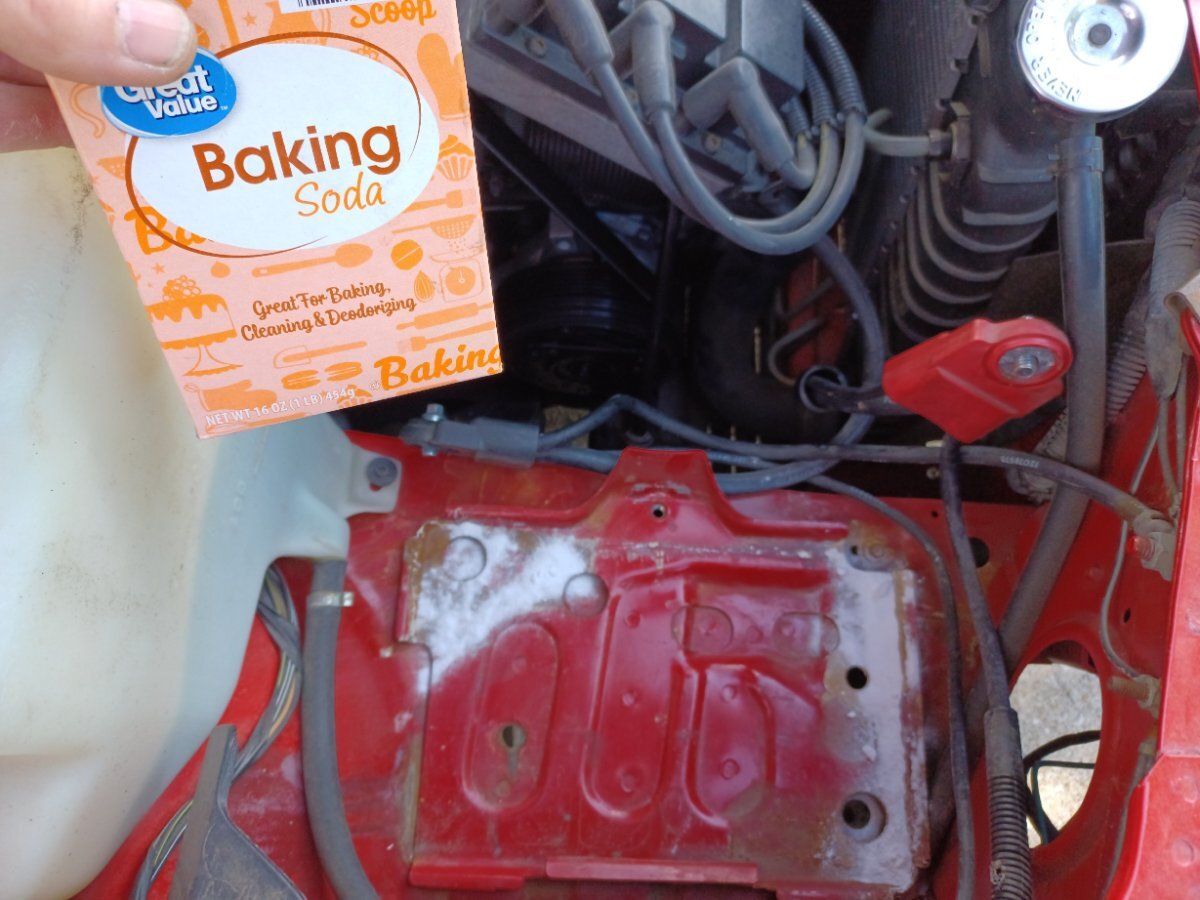
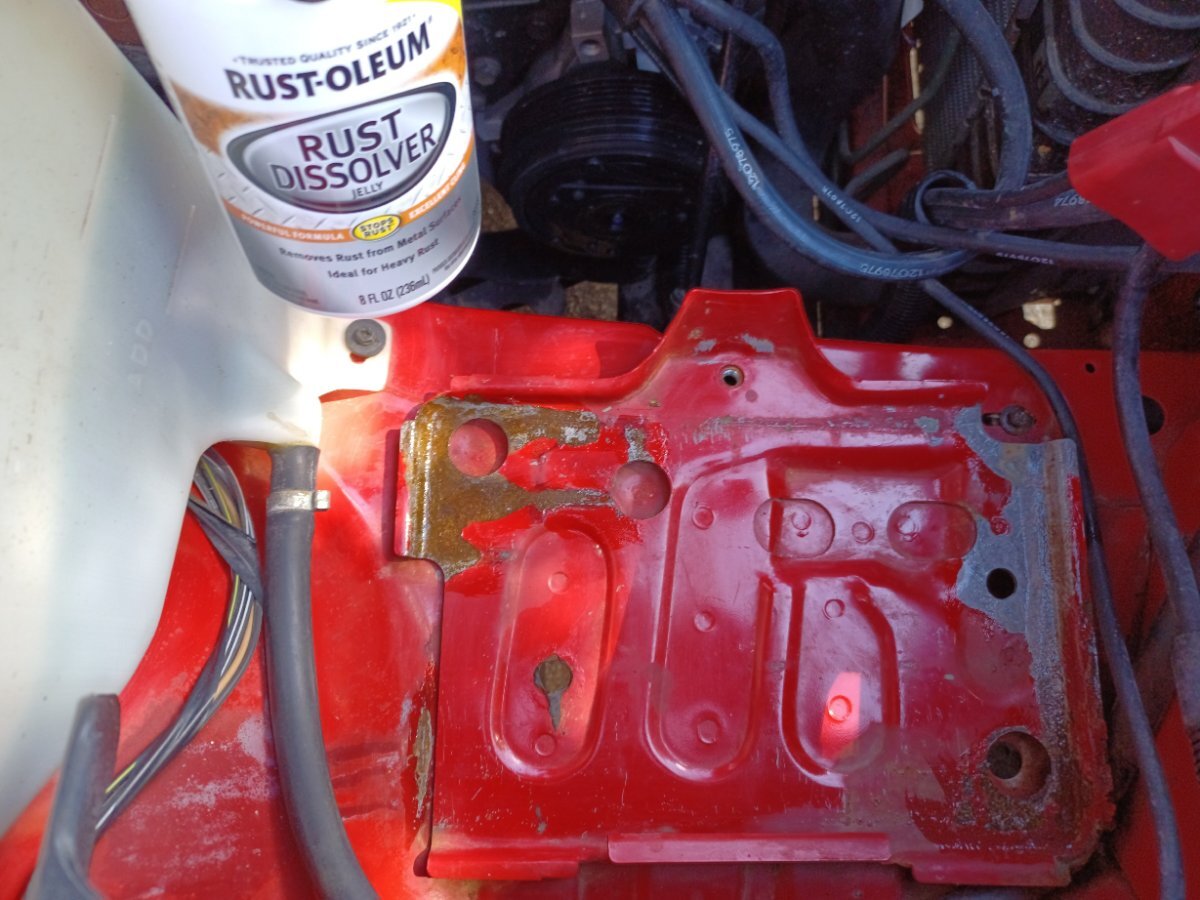
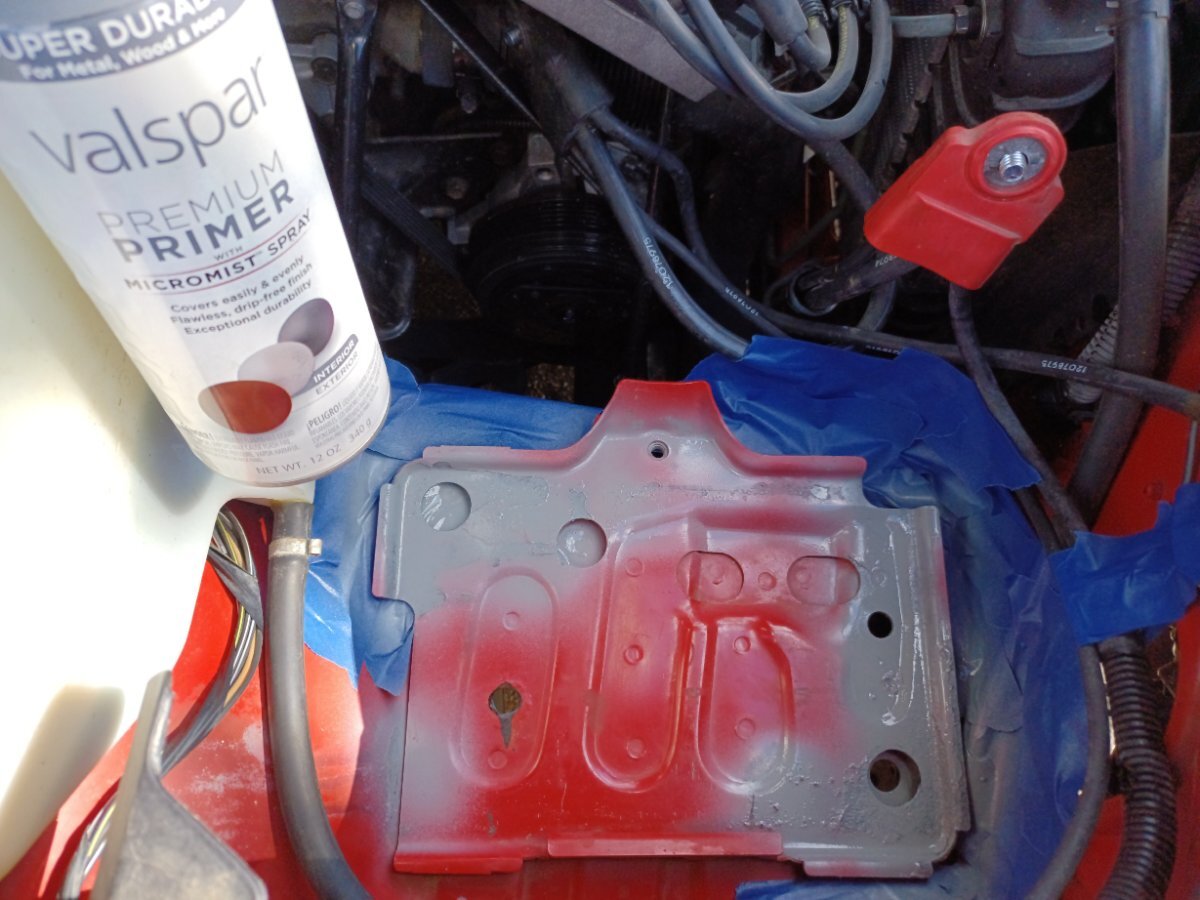
I'd been having intermittent issues with rough idle, and rough running. I've cleaned the MAF sensor, I've cleaned the IAC, I've replaced the crank position sensor. No change. I was on the verge of replacing the ECM. But while I was under the car replacing the crank sensor, I noticed a foul viscous sticky goo on the frame, that seemed to have come from above. The slime was beige, with a greenish tint to it, really nasty looking, very sticky, and impervious to WD-40 and Goo-Gone. When I traced it uphill, it was leaking from the seam between the coil pack (Motorola) and the ignition module. I removed the coil pack, and sure enough, there was a crack on the bottom side with this gross slime oozing out. I had to clean a lot of slime off the wiring that connects the coil pack to the Ignition module. But replacing the obviously failing coil pack didn't change anything, which really surprised me. Inspired by Daves89 post about the ignition harness on his '99 Regal having been the problem, I thought I'd take a look at my Reatta's ignition harness. First step was unplugging the ignition harness from its socket on the ignition module, and that's when I discovered that the wiring harness connector and socket on the ignition module were both fouled with the slime that had leaked out of the old cracked coil. I tried electronic parts cleaner, but the slime was unimpressed. Lots of scraping and digging with tweezers and tiny screwdrivers got much of the goo off of the connector, but there was still plenty of sticky residue on everything. I was concerned that something as aggressive as carb cleaner might soften the wiring harness connector, but as it was useless anyway, unless I could get the slime off, I gave it a try. Carb cleaner did the trick. I wrapped a rag around the connector to keep the cleaner from removing paint or anything else important in the vicinity, and cleaned the socket on the ignition module the same way. Finally, I sprayed off all the goo that had embedded itself into the wiring bundle, hoping that carb cleaner doesn't soften wiring insulation either. After putting it all back together, she started right up and idled smoothly. A short test drive was similarly uneventful. As the problem has been somewhat intermittent, I'm hesitant to say I'm home clear, but it does look like the slime was actually the culprit.3 points
-
Update: SOLVED! I was about to give up and return the Delco coil pack and ICM, but for fun I put the old Magnavox pack on and it wouldn’t work either! I did I did a little googling and came across this old post: https://forums.aaca.org/topic/332605-1990-reatta-occasionally-wont-start/ His problem was that the coil pack wasn’t grounded. I already thought of this, or so I thought. I double-checked and tightened the bolt where the ground wire goes from the engine to the frame. I had loosened it to get to the screws for the coil pack and I thought I had tightened it enough, but I hadn’t. Once I tightened the bolts for both the ground wire and the coil packs, both coil packs worked! It just wasn’t grounded “enough.” Of course I removed the Magnavox one and installed the Delco as has been recommended to me by many people. So the good news is that yes, a coil pack from a 3300 engine (in this case a Buick Century 1993) is the same part and will work. hopefully that opens up some junkyard options for people. Thanks for the helpful comments.3 points
-
another project completed that made a huge difference in how the car was running and idling, i went thru the dx screen and codes , had a code for the cruise servo, ordered a new one on Rock Auto,. installation took all of about 20 minutes, maybe 30 once vac lines was replaced since the connection was cracked on the old one and broke off inside the hose, but once that all was done , took it out for a test drive and i guess that was one cause for vac leak and why the idle was slow and varied up and down. now it is steady and constant idle, and the cruise now works perfectly. Drove to work today and enjoyed being able to set the cruise on the highway for my 20 mile commute.3 points
-
Try www.car-part.com3 points
-
or try www.car-part.com Very simple easy to use website. there's 4 of them within 200 miles of you for less then $200.00 with the lowest $70.00. You can drive over and pick it up along with the extra parts you also need.3 points
-
We need some background on the charging problem. Was the battery not being charged the reason you installed the new alternator? Or did the problem start after you replaced the alternator? Any additional info you can give us would be helpful. Don't assume the alternator is good just because it is new.3 points
-
Edit: nevermind, culprit seems to be two fuses were blown/corroded3 points
-
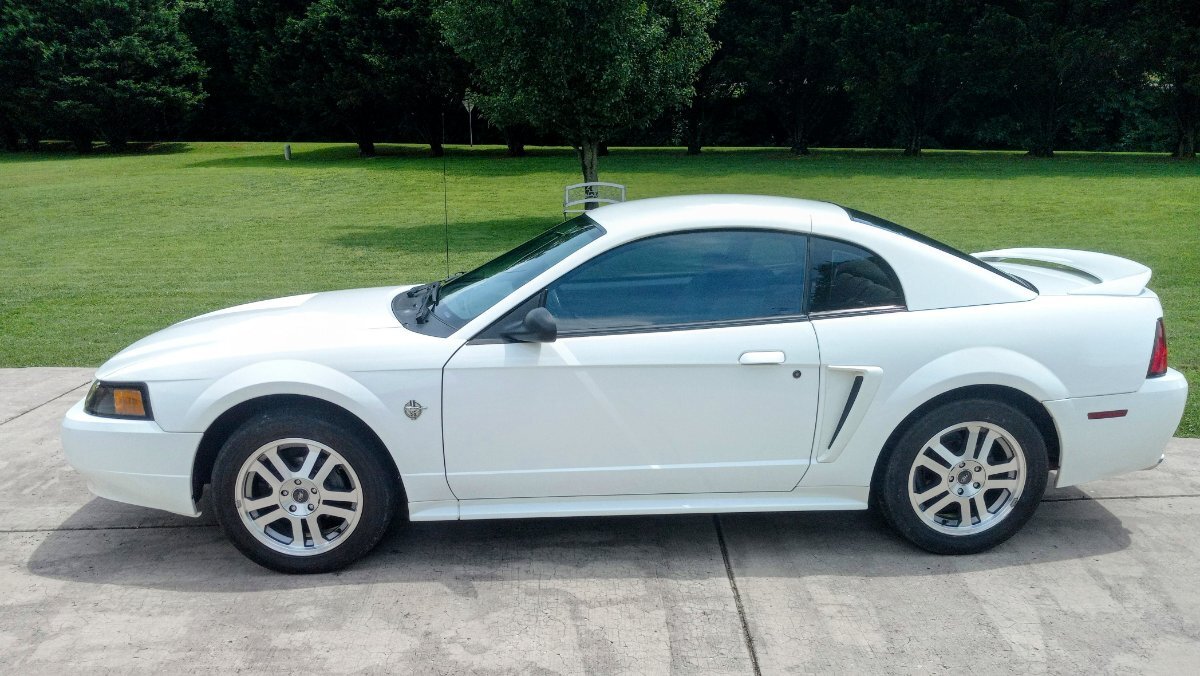
I put new wheels on the driver side and left the old stock wheels on the passenger side, then pulled it outside and took a few photos for comparison. This sealed the deal for me. I will be swapping my tires onto the new wheels soon. I think I will be very happy with the wheels Gary gave me. Before I got my Mustang Gary said he would help me with parts if I bought one but I wasn't expecting this. I offered to pay but he refused take anything. He's a good guy.
3 points
-
I found the issue. To answer your question, it would idle fine with my foot on the brake and other foot lightly on the accelerator. I looked under the hood and way down by the ac drier, the link hose to the vacuum accumulator tank was rotted and broken. Changed it and now it runs fine. I will be going through all these hoses this weekend. The plastic one for the climate control appears to have been changed and is in good shape.3 points
-
Just installed a compass mirror from an Olds. It has the map lights, auto dimming and compass. It was a direct plug and play. No harness adaption needed.3 points
-
The Regal has been running great. Hate to say it, but I like the extra room the Regal has so I use it more and more. One of my cars has to stay outside [the Regal] so I only drive the Red when I know the weather is going to stay nice.3 points
-
The hood might just be stuck. Hold the hood release lever out and get someone to push up and down on the front of the hood and see if it pops up. I had this very same thing happen on an old Mercedes I bought and it took me quite a while to figure out why the hood wouldn't open.3 points
-
Doing it on a Ranger makes no sense but doing it on a Mustang that is supposedly a "high performance car" is just plain crazy. It's got a fiberglass hood and trunk lid, aluminum overhead cam heads, limited slip differential, dual exhaust from front to back and huge roll bars for handling. Then they install a fake oil pressure gauge? Whoever came up with that idea should have been fired.3 points
-
Like most things, it sometimes makes no sense. People are repairing, or at least trying to repair, Reatta's that should be parted out and others are just the opposite. Seemingly decent cars that deserve some TLC are being scavenged and discarded. Definitely well under $1k for a running parts car, much less than that for a lawn ornament, unless of course it has exactly the stuff you need. Mixing and matching colors, inside and out, or model years with incompatible content really limits the usefulness.3 points
-
i called and they say not available or in stock2 points
-
I've been active on a few "owners web sites" (cars, boats, RVs,) over the years. This has always been an issue. Someone asks for help, a lot of guys jump in, but there is no " Hey guys, I'm back on the road/water" thanks for the help. There doesn't seem to be a way the solve this..... No closure............2 points
-
Standard operation for Federal Reatta's: fog light switch on and the lights will go on and off with the ignition switch. Bear in mind, all lights except headlights will now operate with ignition.2 points
-
Thanks so much, Ronnie. That is just the information I needed. I will give that a try tomorrow.2 points
-
back in the day when we were doing compass mirrors in our Reattas I also grabbed a couple from Olds Intrigue. They used a different harness from the Reatta but as luck would have it the harness is the same as the Regal making it plug and play. So now this directionally challenged driver has some idea where I'm going!2 points
-
so it was a low voltage issue, once i got the battery fully charged back up from it sitting for a week not driving it, the flicker is gone. Phil2 points
-
The strut you need is discontinued. However there was a long post some time ago using a different strut from Monroe that had the same specifications, we were able to fabricate a working rear strut complete with the correct mounting bracket that also had to be fabricated. Marck at East Coast Reatta had contacted Monroe and had a run of 500 #71966 struts made but that is also now sold out. He was selling them for $499.95 a pair plus freight. I have one extra set of the fabricated rear struts available. My price is $375.00 with freight. Contact me if interested.2 points
-
I am going to Walmart. $76.00 plus tax for removal of old tires, cleaning up the bead, putting on the tar product used to enhance seal, mounting and balancing of the "new" tires and then lifetime rotation.2 points
-
Those wheels look great on that car Ronnie! Glad you got them. And you can keep talking about it if you want.2 points
-
It used to be easy to walk into any auto parts store and get what you need but not so much today, The LN3 was discontinued in 1990 and while similar to the Series 1 there are some small differences. You will want a gasket set for the timing cover, which should have not just the case gasket but also a new crank seal, new o-rings for the heater pipes and maybe one for the oil filter adapter but that can stay in place when the cover is removed. Definitely replace the magnet if doing the timing chain set, also called an interrupter. Replace the formed water bypass hose which connects the intake manifold to the water pump area. There is no reason to replace the harmonic balancer unless the rubber face is getting cracks in it or missing pieces. Yes, replace the CPS. The timing chain set is up to you, but I have always recommended the genuine GM part, chain made by Morse, due to the smoother top surface which rubs against the plastic chain damper. Be sure the chain damper is the correct one, not just the style. There is one for counter-bored and chamfered bolt holes. Usually the chamfered is the correct one. In case it comes up while gathering parts, it is a three bolt cam.2 points
-
Just got back from my long day driving. 355 miles and no hiccups. Ran like a top with some long drives, short drives between appointments and numerous start and stop on the ignition. Also checked the gas mileage and got just a tad over 30 miles to the gallon. Pretty impressed!2 points
-
On the 1989's, I think when you adjust the temp down below 65 degrees, the display states "Max Cool" or "Max AC"2 points
-
Welcome to the forum! Popping and crackling is usually cause by bad capacitors in the radio and/or bad speakers. The original speakers have paper cones and will rot and come apart over time. Reatta Owners Journal - Radio Capacitor Replacement2 points
-
Yeah, I agree that some chrome wheels are needed. Even though it has the "premium" wheels for that year, it has the same problem the stock Reatta wheels have. They look too much like hubcaps. They don't add much bling to the car. In my opinion wheels can completely change the look of a car. I'm just waiting for the right wheels to come along locally at a good price.2 points
-
Since this is a recent purchase, it would be a good idea to replace the O2 sensor just as a maintenance item. The comment about the o-rings above would seem to indicate perhaps some service work was performed incorrectly as well.2 points
-
I think if the injector rail is bolted down correctly, the injectors should be pushed into the manifold far enough to where you dont see the O-rings. Maybe a pic if what you see will help.2 points
-
I'm no longer able to tell stories about troubleshooting my Reatta but I do have an interesting troubleshooting story about me wasting several hours of my time by making an assumption about how something works. Since I got my GT I always wondered why the oil pressure gauge went up half way to the "normal" position when I started the engine cold or hot and stayed there all the time no matter what the RPM. That seemed odd to me so I temporarily installed a mechanical oil pressure gauge on the engine to make sure I had good oil pressure. The mechanical gauge showed 75 psi at idle on a cold start and then it went down to 35 psi at idle when fully warmed up. Spec in the repair manual is 20-45 psi at 1500 RPM when hot. I had 49 psi at 1500 so oil pressure is great. So, in typical Reatta thinking, I assumed the oil pressure sending unit was bad and replaced it with a new one. Still the gauge in the instrument panel read "normal" all the time. Bad gauge? NO. After reading on the forums I discovered all GTs of similar model years as mine have the same "normal" reading without the needle ever moving just like mine. The gauge isn't a real oil pressure gauge at all. IT'S AN IDIOT LIGHT in the form of a needle on the instrument cluster gauge. The oil pressure sender I replaced is just a switch that closes above 6 psi and tells the needle in the gauge to move to the normal position. Either the gauge reads "0" as it does when the engine is off, or "normal" no matter what the real oil pressure is as long as it's over 6 psi. For me, the oil pressure gauge is the most important gauge on the dash of a car. You can't even make the gauge on my GT work as a normal oil pressure gauge that actually reads pressure by installing a real oil pressure sending unit. It wasn't designed to do that. What were the fools at Ford thinking when they put a oil pressure gauge like this in a Mustang? Even a real idiot light would be better than this stupid gauge design. Rant over 🙂2 points
-
I ended up having the compressor, dryer and the little valve in the line replaced. As I was sitting on about 10 cans of R-12 I stayed with the r-12. Also had the antifreeze flushed and filled as the radiator is in the way of getting the compressor out. Ready for spring!2 points
-
ICM (Ignition Control Module) Ignition coils ECM (Engine Control Module) MAF sensor (Mass Air Flow) CPS (Central Power Supply) Generator (alternator) Drive belt tensioner Fuel pump, strainer, & deflector Oil pressure sensor Rear struts (if you have $$$)2 points