Leaderboard


Popular Content
Showing content with the highest reputation on 10/10/2023 in Posts
-
Today turned 327,000 miles. 1000 miles in 10 days...4 points
-
You can pull a sparkplug out, then get some rope and feed it into the sparkplug hole. Now turn the pulley bolt counterclockwise slowly, it should stop when the piston in the cylinder pushes up the rope against the cylinder head. Now you should be able to get the bolt off. Once you get the dampner off reinstall the bolt and turn the crank enough to pull the rope out. no2 points
-
It seems a bit early to put it away so soon. Not to brag but I put on about 800 miles just last week. Tuesday alone was 420...2 points
-
My Reatta igloo doesn't have a traditional driveway leading to the street. So, when it snows during the Winter, I don't shovel that area. I wait until it melts in the Spring. Also, once the Reatta and Eldorado are put away, I don't start them during storage...just a personal preference. The Eldorado is put away in my garage. I do shovel there just in case I need to use it in an emergency.1 point
-
ME to. I have parts for cars I no longer own. I just can't seem to get them up for sale or give away.1 point
-
If the pan is off you can insert a bar in a crank throw or if the flexplate is installed on the rear it can be clamped or jammed. An impact is probably the best if available as it is easy to tip an engine stand over with a lot of torque on the bolt. I don't know if the Series 2 is similar to the LN3 in that department or not.1 point
-
I typically put the Reatta away in early October each year. I will drive the 2000 Eldorado until just before snow arrives. It too will then go into storage until the following April. Then with both cars put away, I share our daily driver 2014 Caddy ATS All Wheel Drive turbo with Diane.1 point
-
Well today, Oct 9, 2023, the Reatta went into storage (the igloo). Put seafoam in the tank, filled it up, detailed the interior and exterior, hooked up the trickle charger, put a cover on it, and said goodby until April 2024. Drove a whopping 762 miles for 2023!1 point
-
I really do need to conduct a more complete inventory of what's in my Reatta "parts bin(s)"! Should make a great winter project.1 point
-
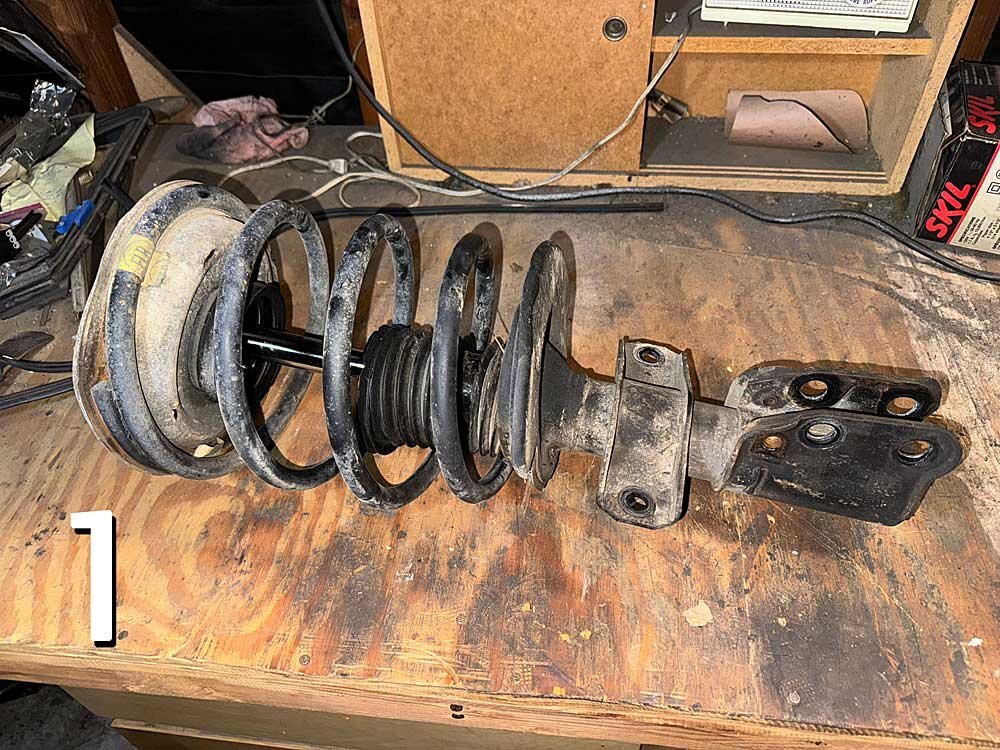
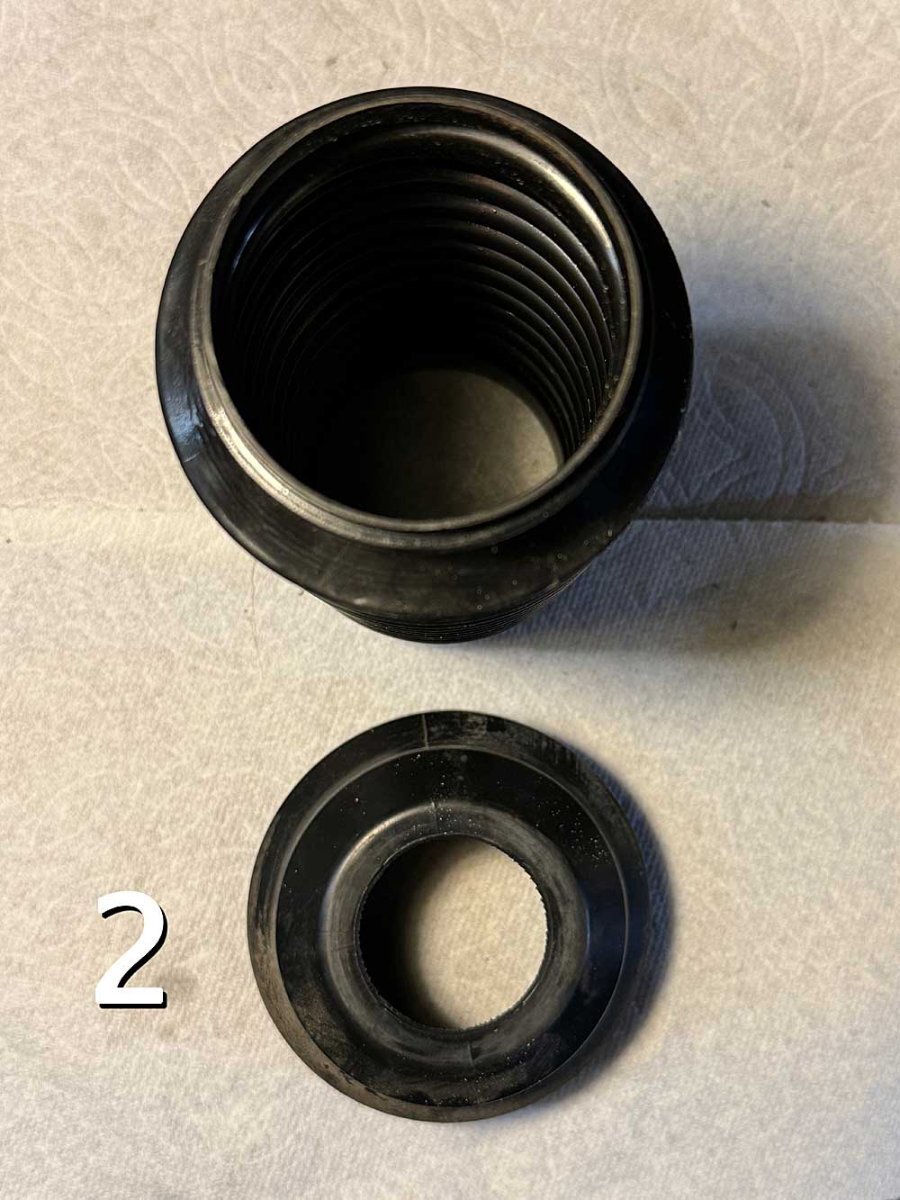
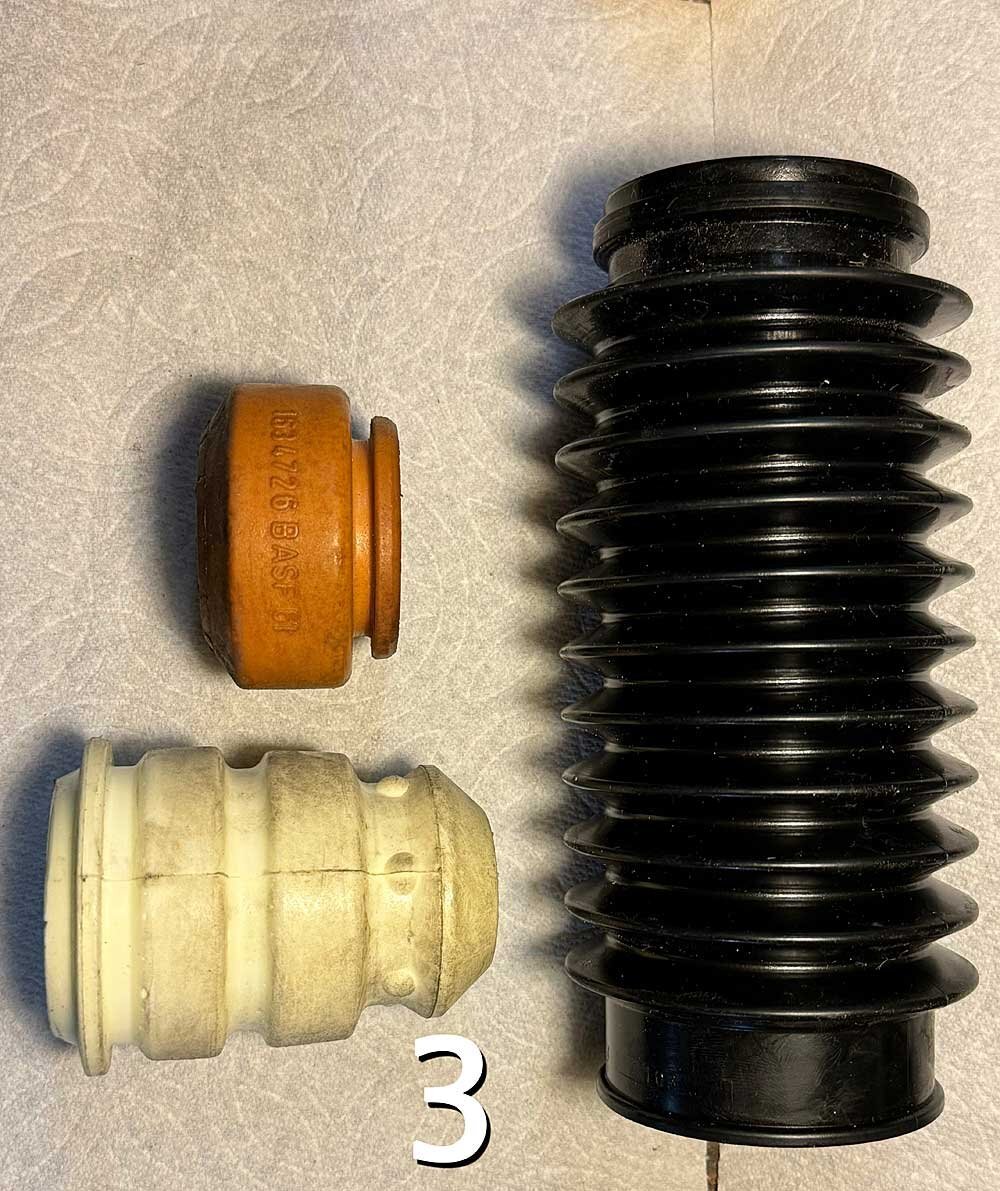
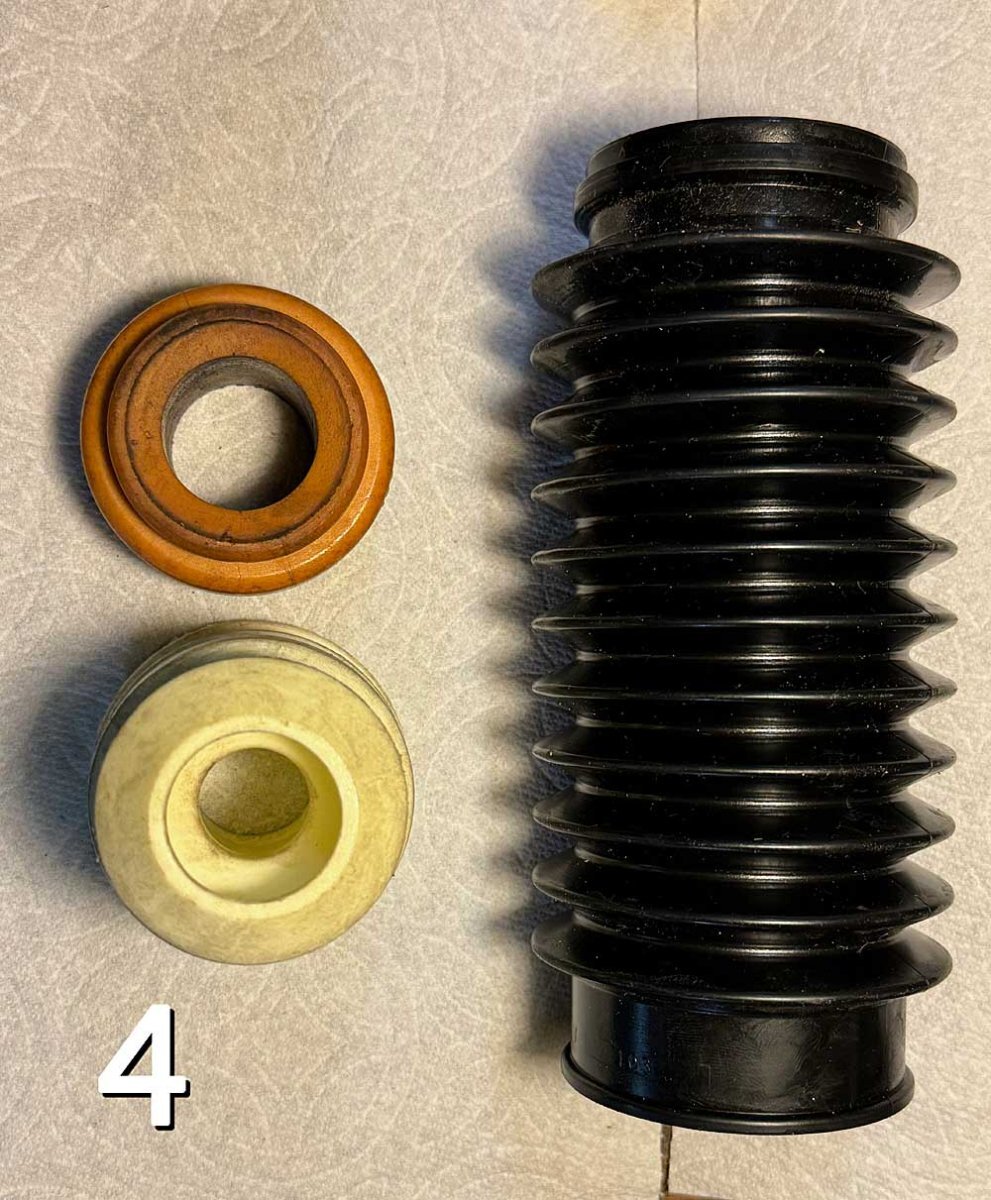
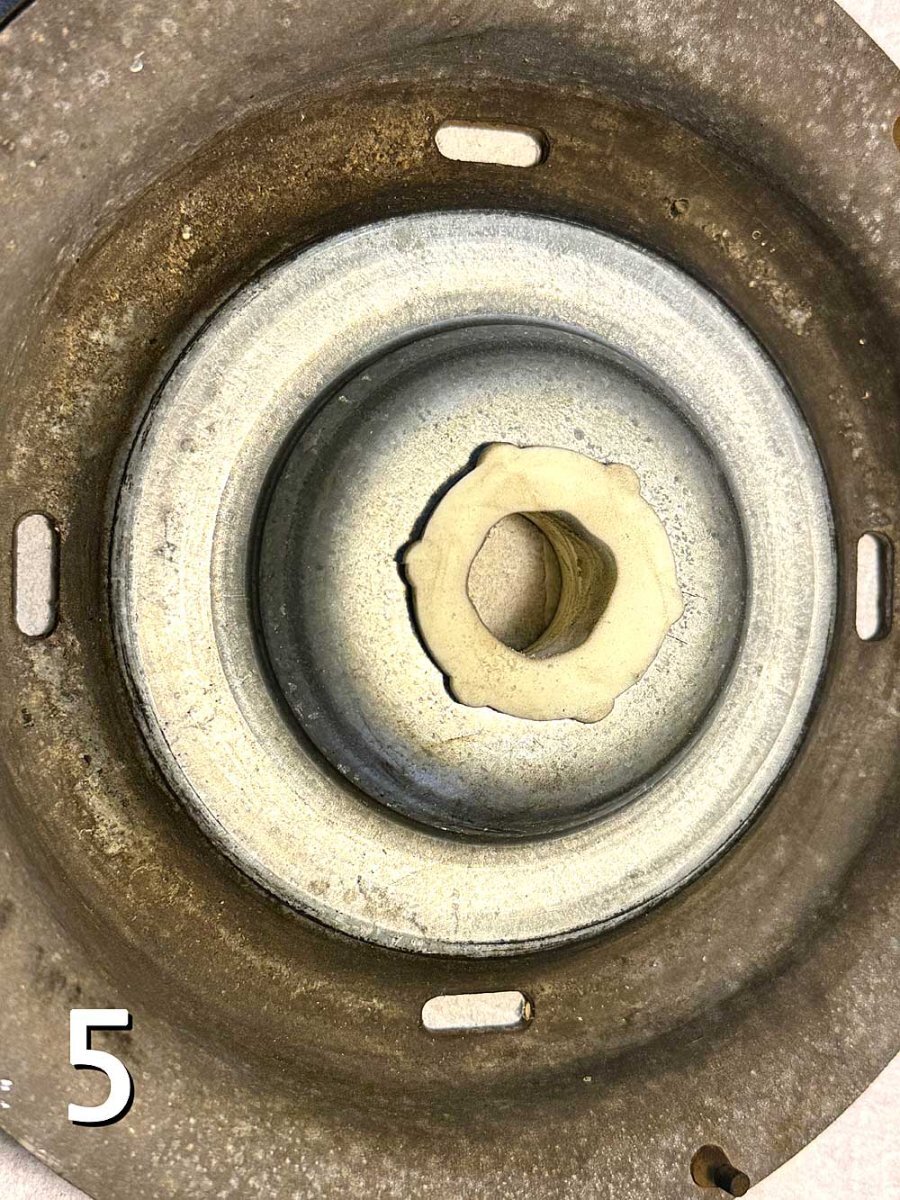
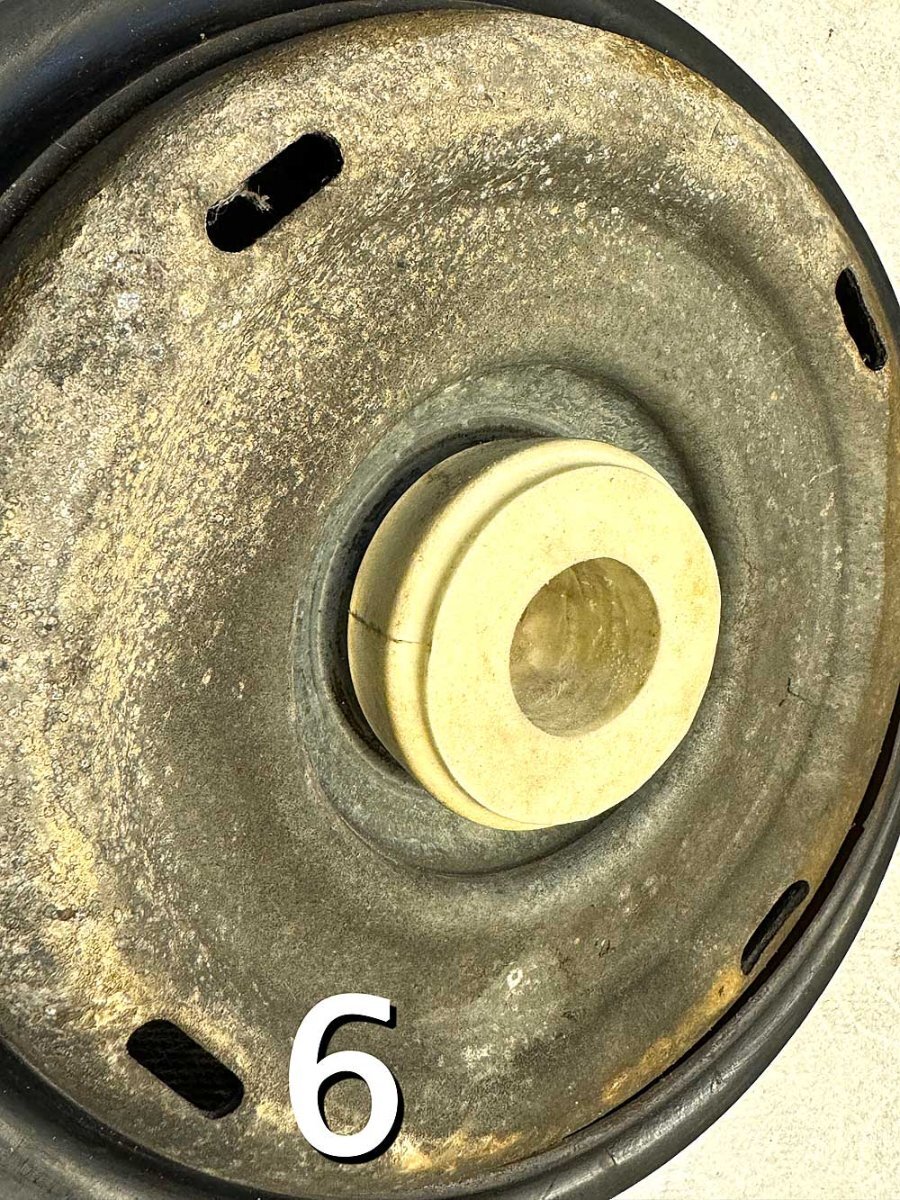
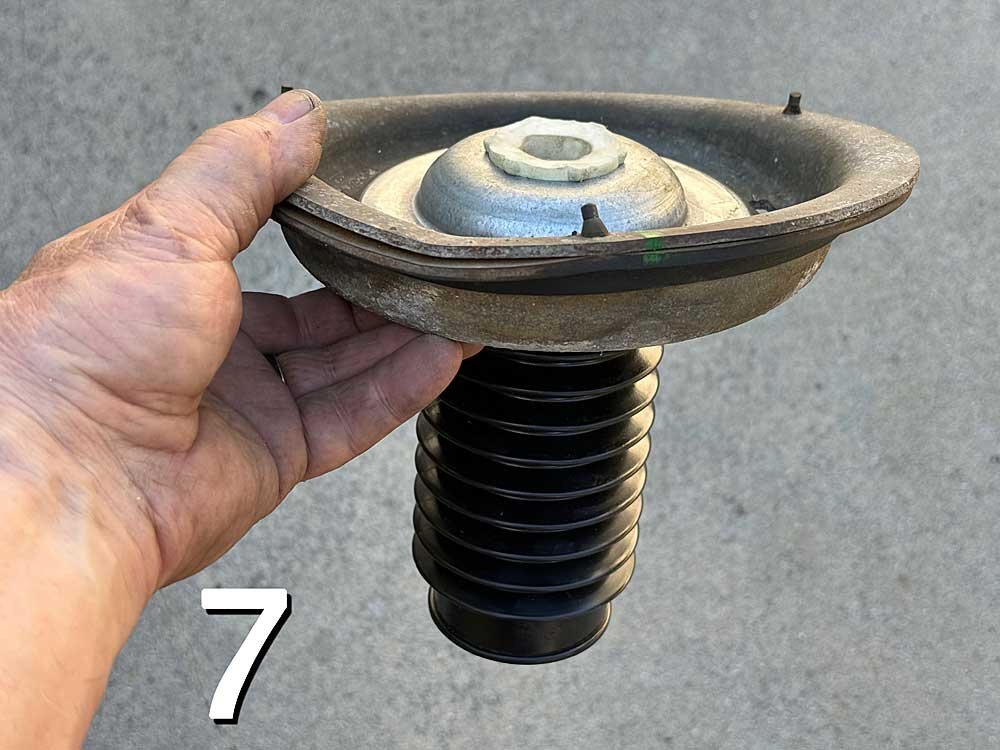
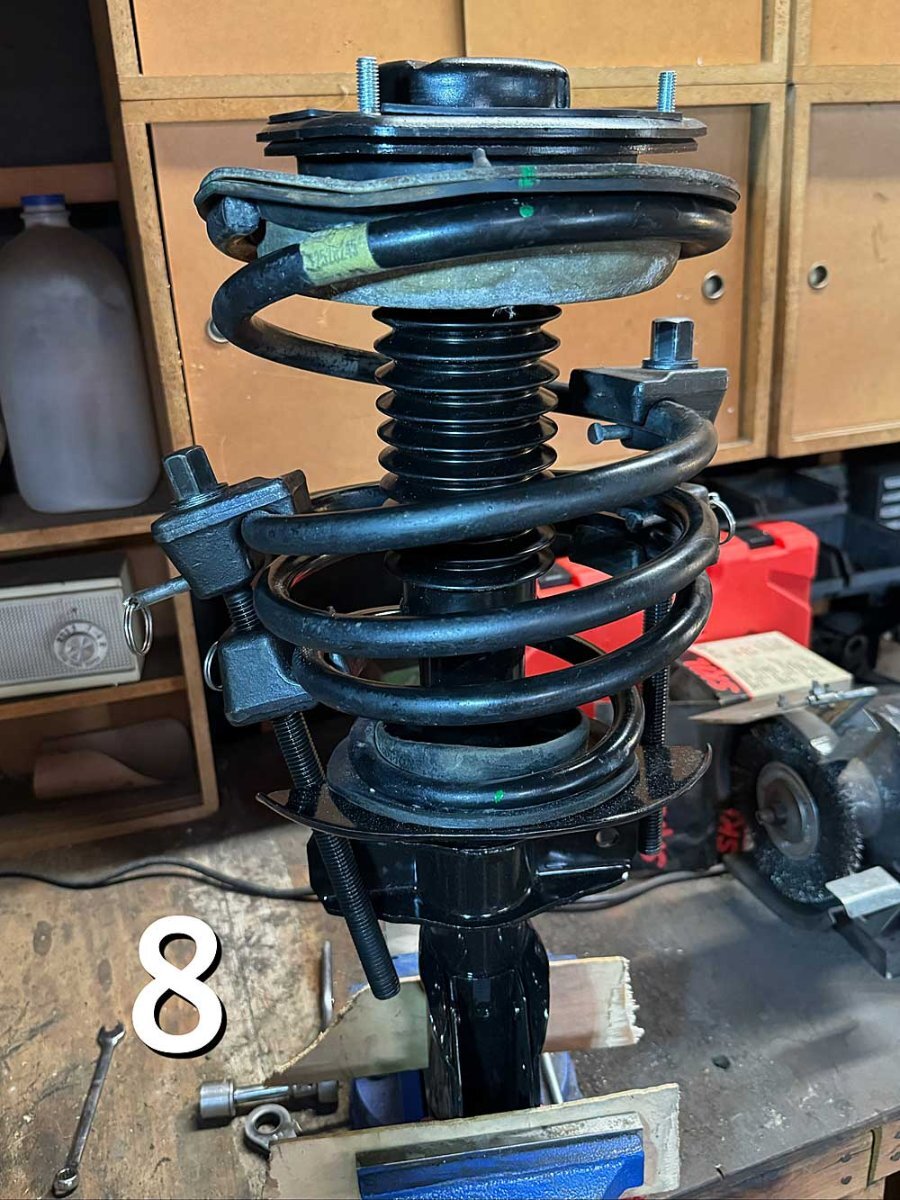
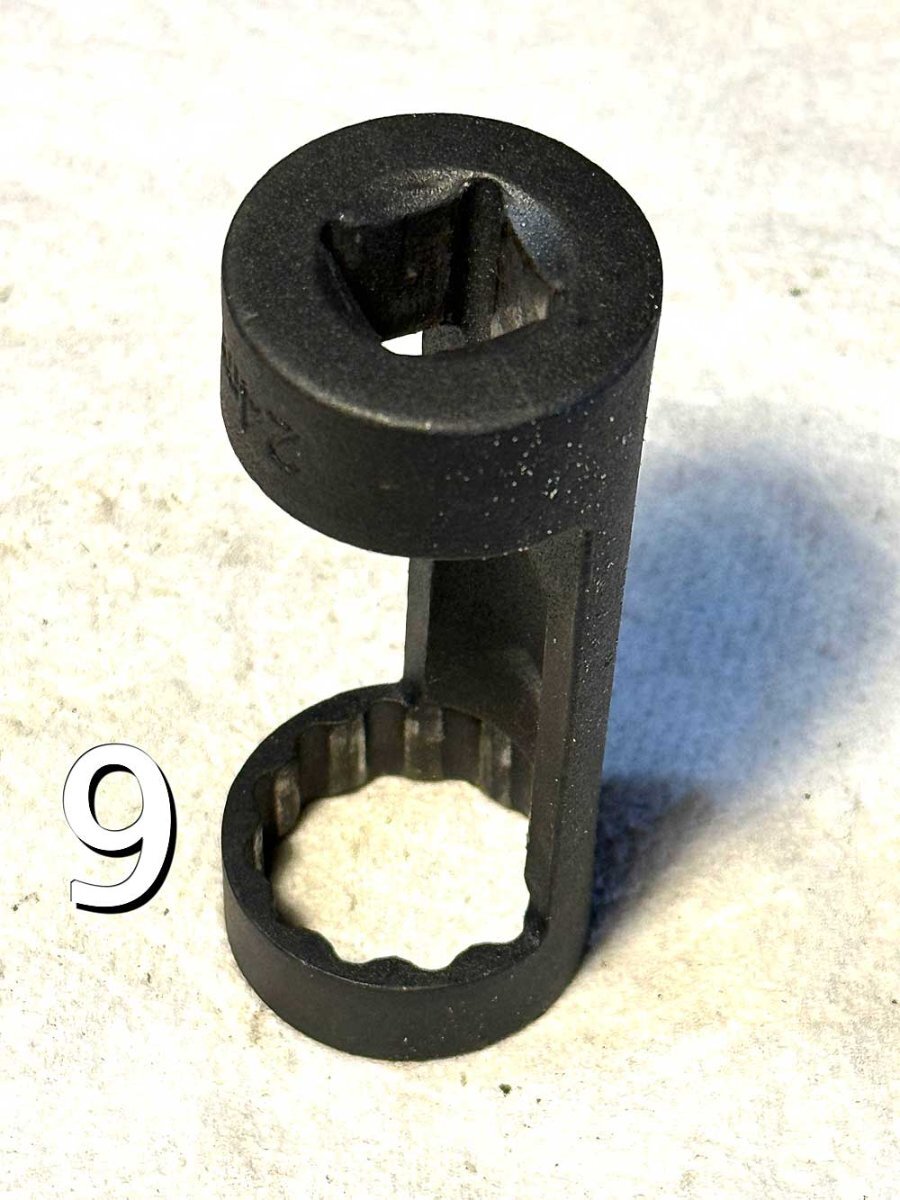
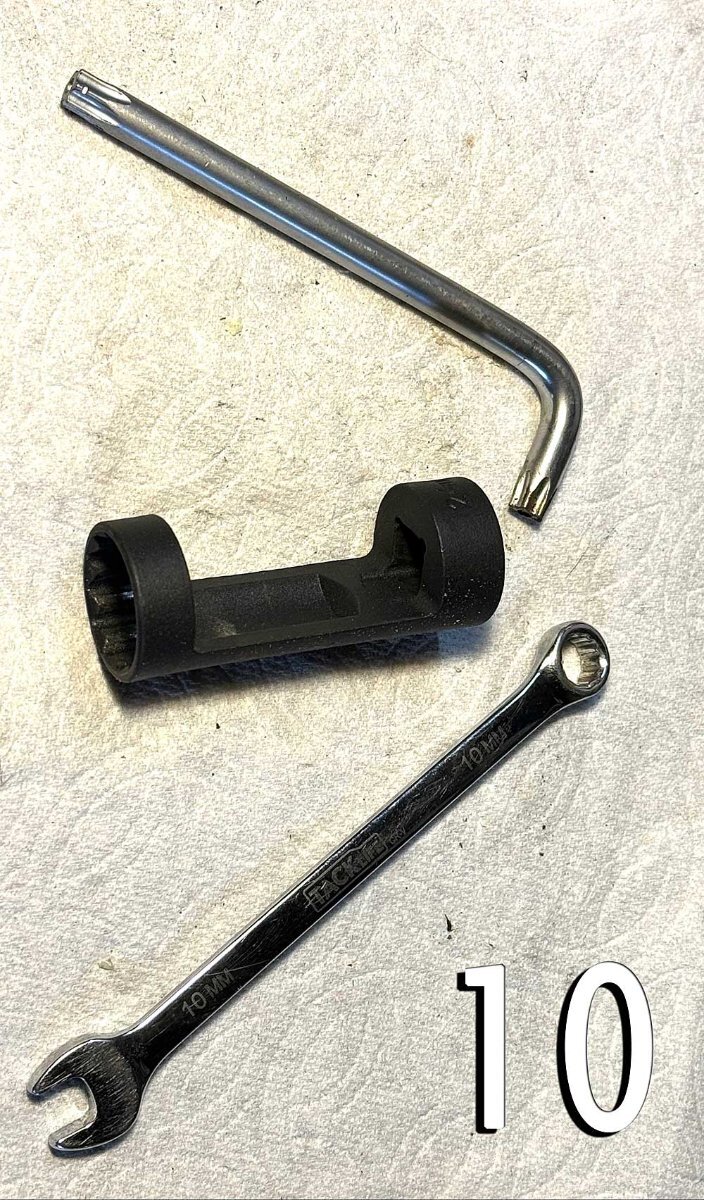
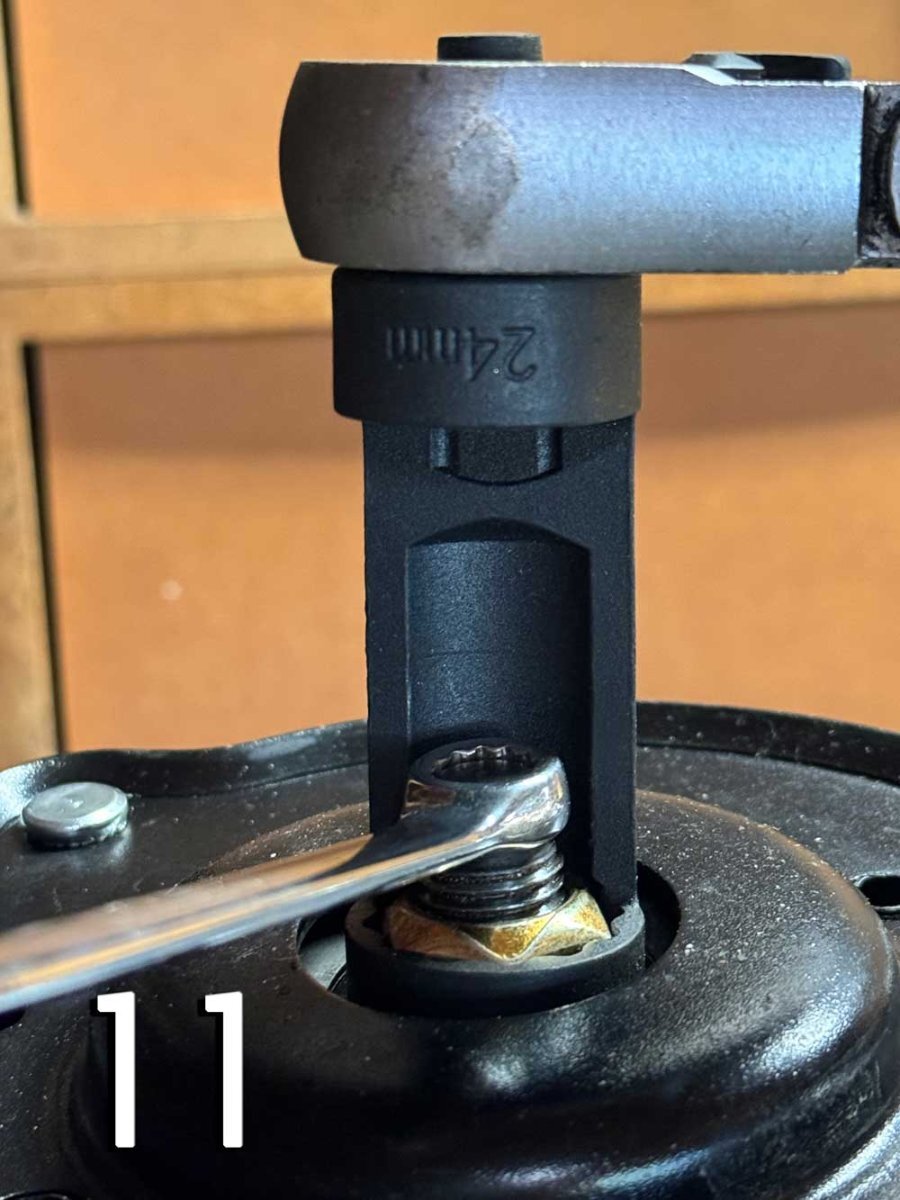
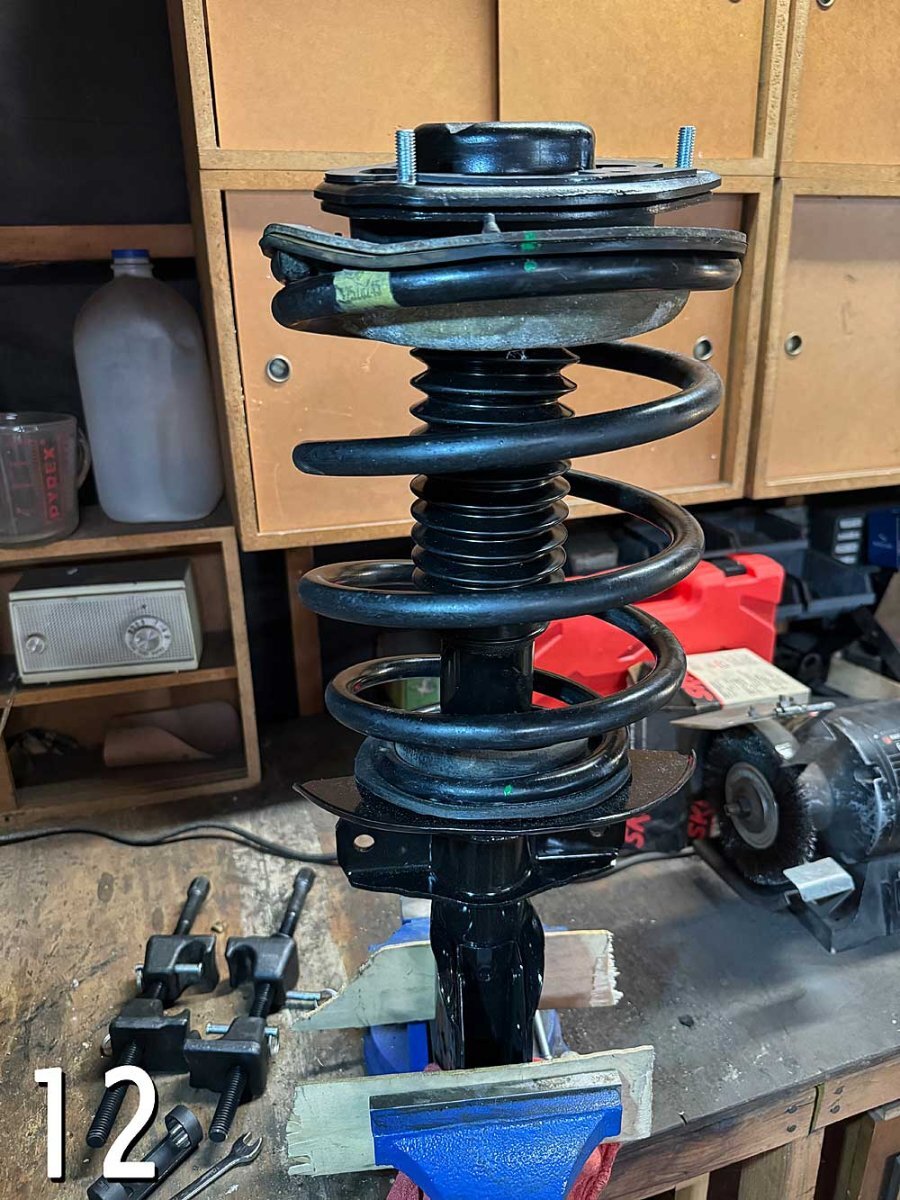
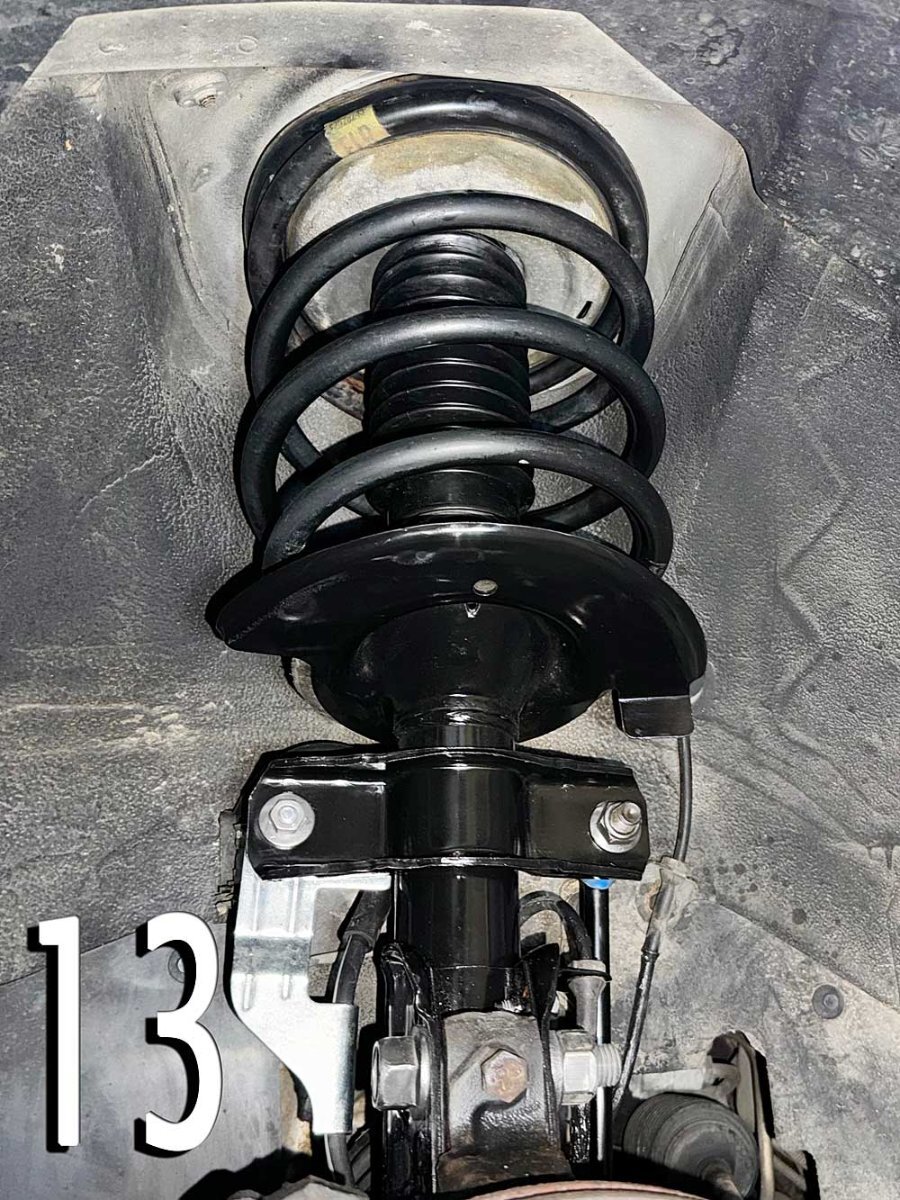
My 1990 Reatta with 87K miles needed new struts all around. The job seemed more complex than simply changing shocks on my 1950's classics. But thanks to the guides here on ROJ, I'm proud to say I did it successfully. Some shops gave breathtaking labor quotes, more than my budget is comfy with. So I read through the guides here on ROJ, took my time, with an excellent outcome. All 4 original struts on my Reatta were totally shot. They weren't leaking, but they weren't absorbing road shocks. The pistons just dropped into the bores. I assume every Reatta that still has the original 30+ year old struts either needs or will need new struts. I bought the previously unobtanium rears from ECRP, and Monroe front and new mounts from Rock. ECRP says Monroe will not do any more runs or our 71966 rears, so suffer the ECRP price and get 'em while you can. After following the guides on this site and finishing the strut job, I'm very impressed with the newly refreshed ride, and proud that I was able to do the job myself. I have an appointment at an alignment shop this week, mandatory after changing front struts. Here are some tips from replacing the front struts I will share. This $13 tool from Amazon made it easy to deal with the nut on top of the front strut mounts. https://www.amazon.com/dp/B0BKZXJ881?psc=1&ref=ppx_yo2ov_dt_b_product_details I ordered front strut dust cover bellows from 2 vendors that claimed their bellows were correct for Reatta, but the "bump stops" didn't fit. I modified the bump stop on the KYB bellows, and it functions perfectly to hold the bellows in position, while fitting into the upper spring seat plate. The supplied bump stop was too tall, interfering with the strut mount, and the inside diameter of the bump stop was too small to fit on the strut piston. My Dremel tool solved both problems. Description of 13 photos: 1. original strut - note the broken bellows. When the strut was unbolted from the strut mount, the rod sank into the bore...totally shot, but not leaking fluid 2. New KYB bellows inside diameter at gripping lip at top is larger than original. Can't use the original GM orange dust cover retainer/bump stop which requires smaller diameter sealing lip on the bellows 3. New KYB bellows with original orange GM dust cover retainer/bump stop, and the new bump stop included with KYB bellows. I cut the KYB bellows at top and bottom, and reamed out the inner diameter to match the GM original 4. New KYB bellows with original orange GM dust cover retainer/bump stop, and the new bump stop included with KYB bellows. I cut the KYB bellows at top and bottom, and reamed out the inner diameter to match the GM original 5. KYB bump stop with crown cut off, inserted into upper spring seat plate. Crown must be cut off so that strut mount fits correctly on top of spring seat plate 6. lower side of spring seat plate with KYB bump stop installed, cut shorter 7. KYB bellows pushed onto modified KYB bump stop, with a smear of JB Weld to permanently attach the bellows to the new bump stop 8. New front strut and strut mount with spring compressor 9. 24mm strut nut tool from Amazon 10. Strut nut tool with 50mm torx bit for original strut, and 10mm hex for the new strut 11. This inexpensive tool is much better than clamping the polished chrome rod with vice grips to keep it from turning 12. New strut assembly ready to install 13. New strut installed
 1 point
 -
Either check with Jim Finn reattas60@gmail.com or Marck Barker East Coast Reatta Parts.1 point
-
I ran into a similar situation with a '91 model S-10 pickup. It had a 4.3 engine with throttle body injection. It would start running poorly and then finally die after 10-20 miles of driving on the interstate. After sitting for a few minutes it would start back up as if nothing was wrong. Then it would repeat after driving more. One day it died on the ramp coming off the interstate at a gas station where I was going to fill up with gas. When I removed the gas cap to put fuel in I heard a loud sucking sound as I removed the cap. The gas cap on it had a check valve in it that is supposed to let air in but not allow fumes to go out. The check valve in the cap was stuck causing a vacuum in the gas tank. I replaced gas cap and the problem went away. The next time your '91 starts acting up, check the gas cap to see if you have the same problem.1 point
-
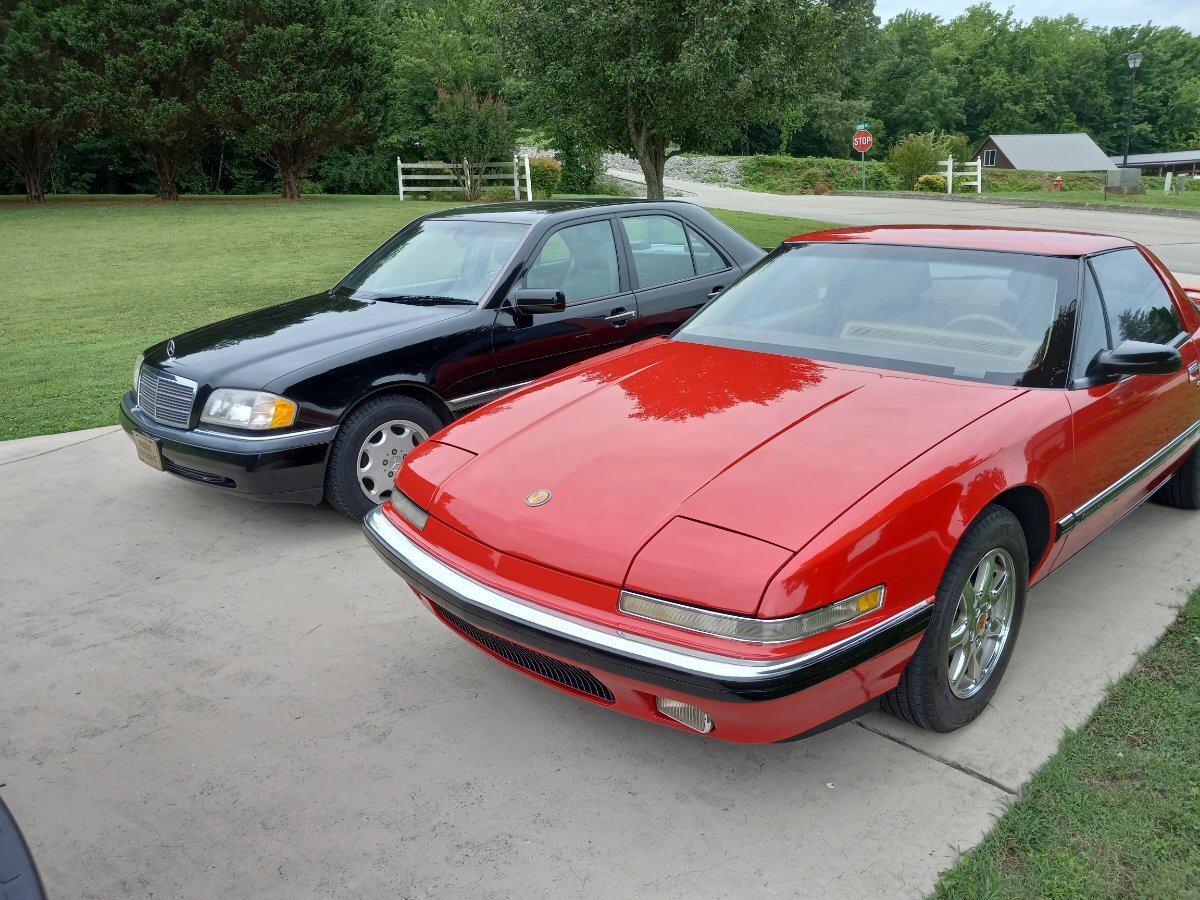
My most recent Reatta photo...
1 point